

Video Editor · Article 13 of 18
Adding and Editing Zooms
This walkthrough demonstrates how to manage zoom effects within the Slide Editor in Superdegree. You will learn how to inspect and customize existing zooms, visually reposition and resize zoom focus areas, insert new zooms into the timeline, and delete unwanted zooms.
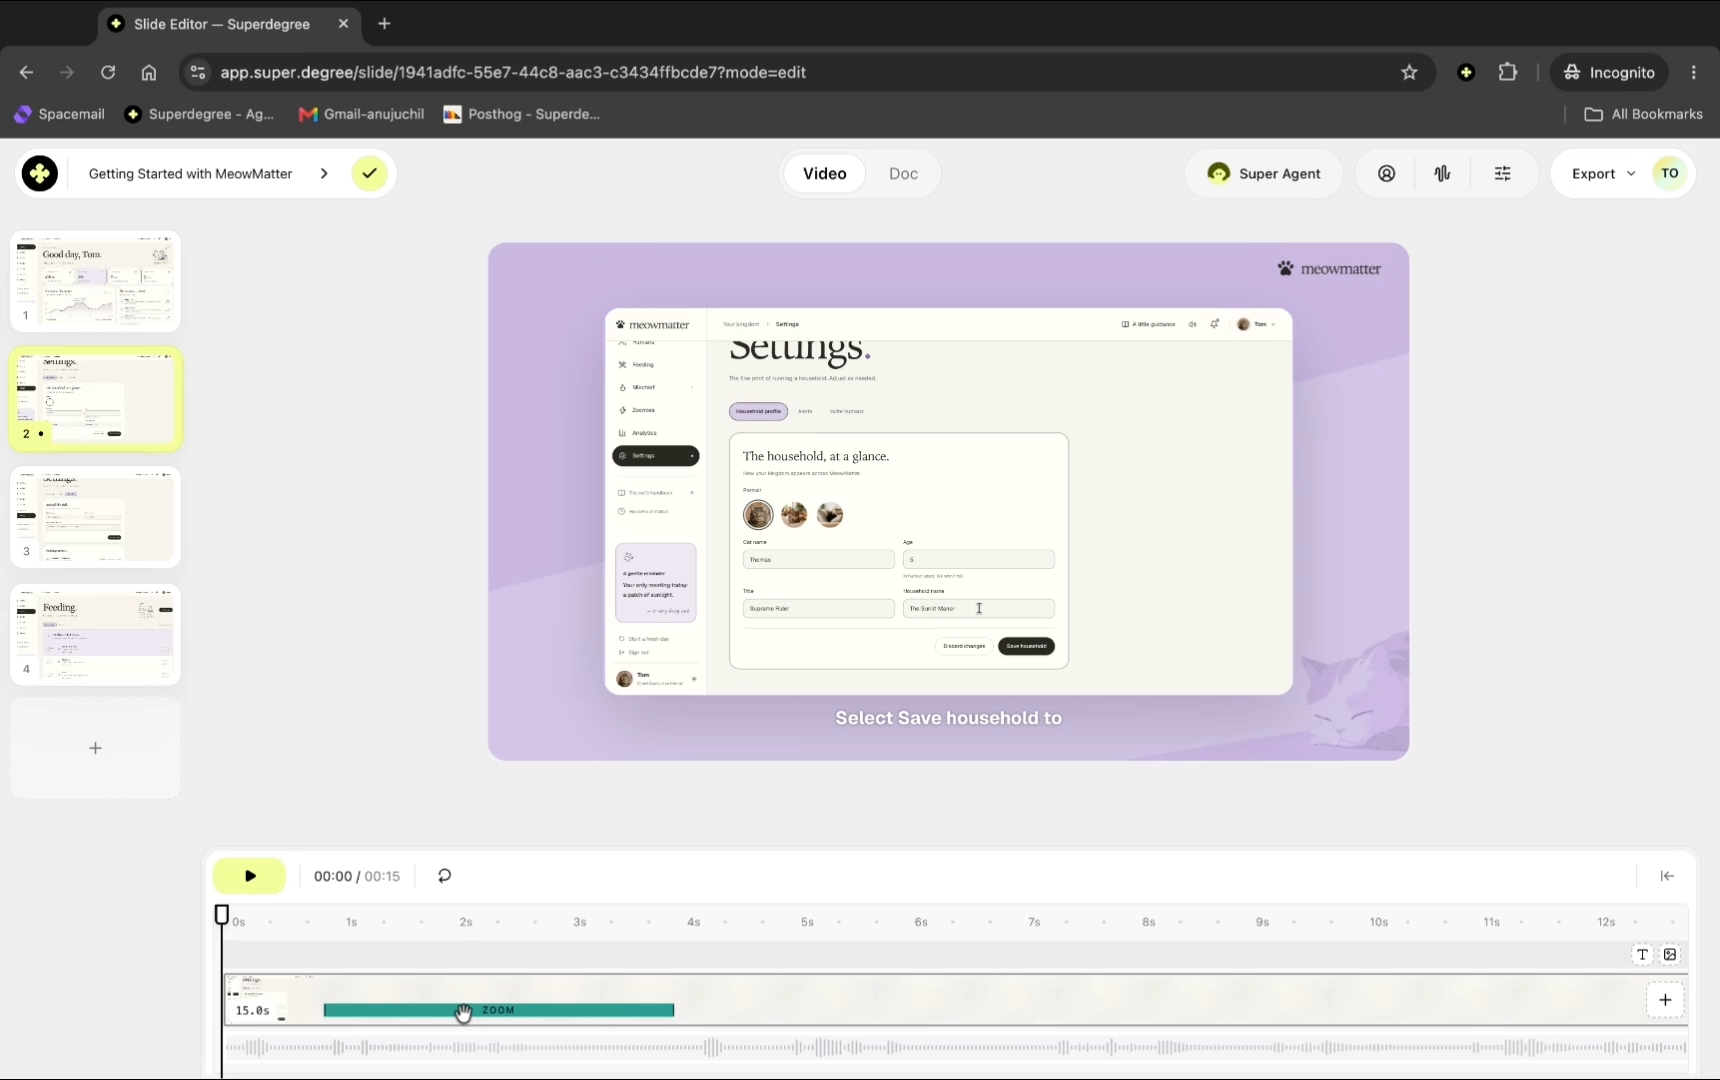
Open the zoom settings panel
Click on the blue Zoom strip located above the timeline track to open the zoom configuration sidebar, where parameters such as timing, scale, and easing transitions can be adjusted.
Launch the visual zoom editor
In the zoom sidebar panel, click Edit area to open the interactive zoom overlay directly on the preview video canvas.
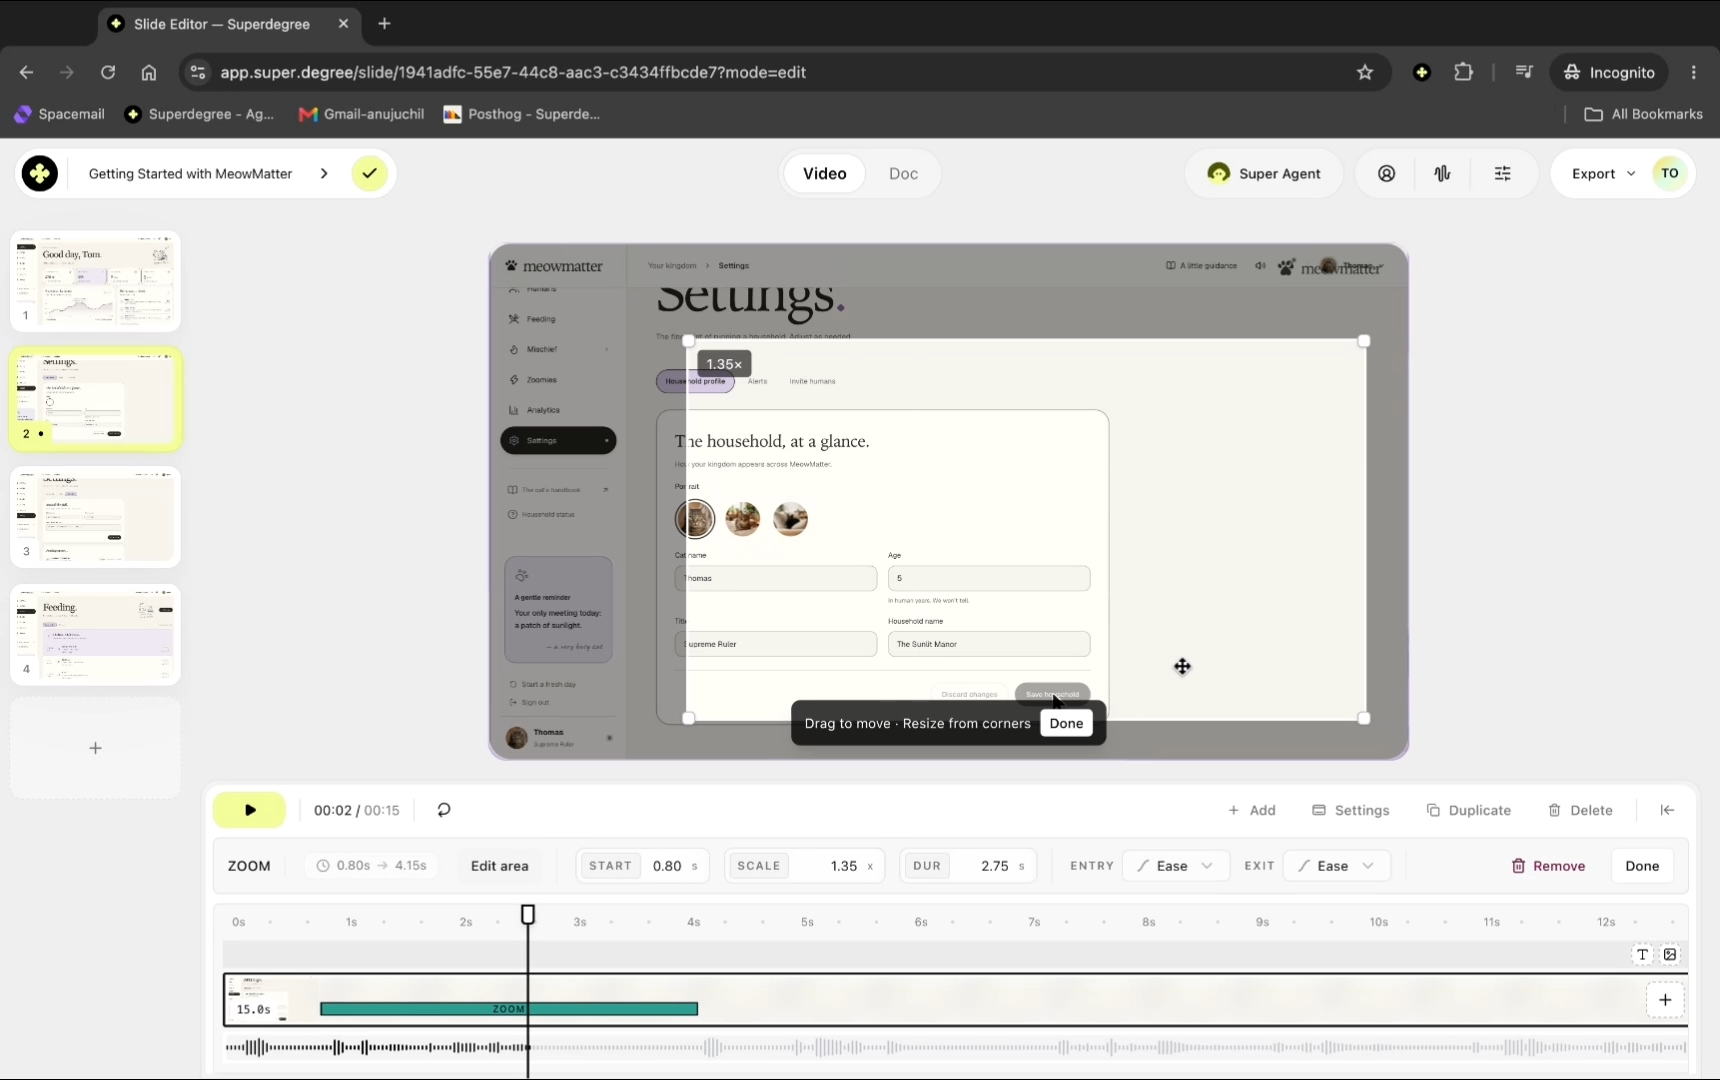
Drag the bounding box or its corner handles to resize and reposition the focus area to the exact element you wish to highlight, then click Done to save the changes.
Add a new zoom to the timeline
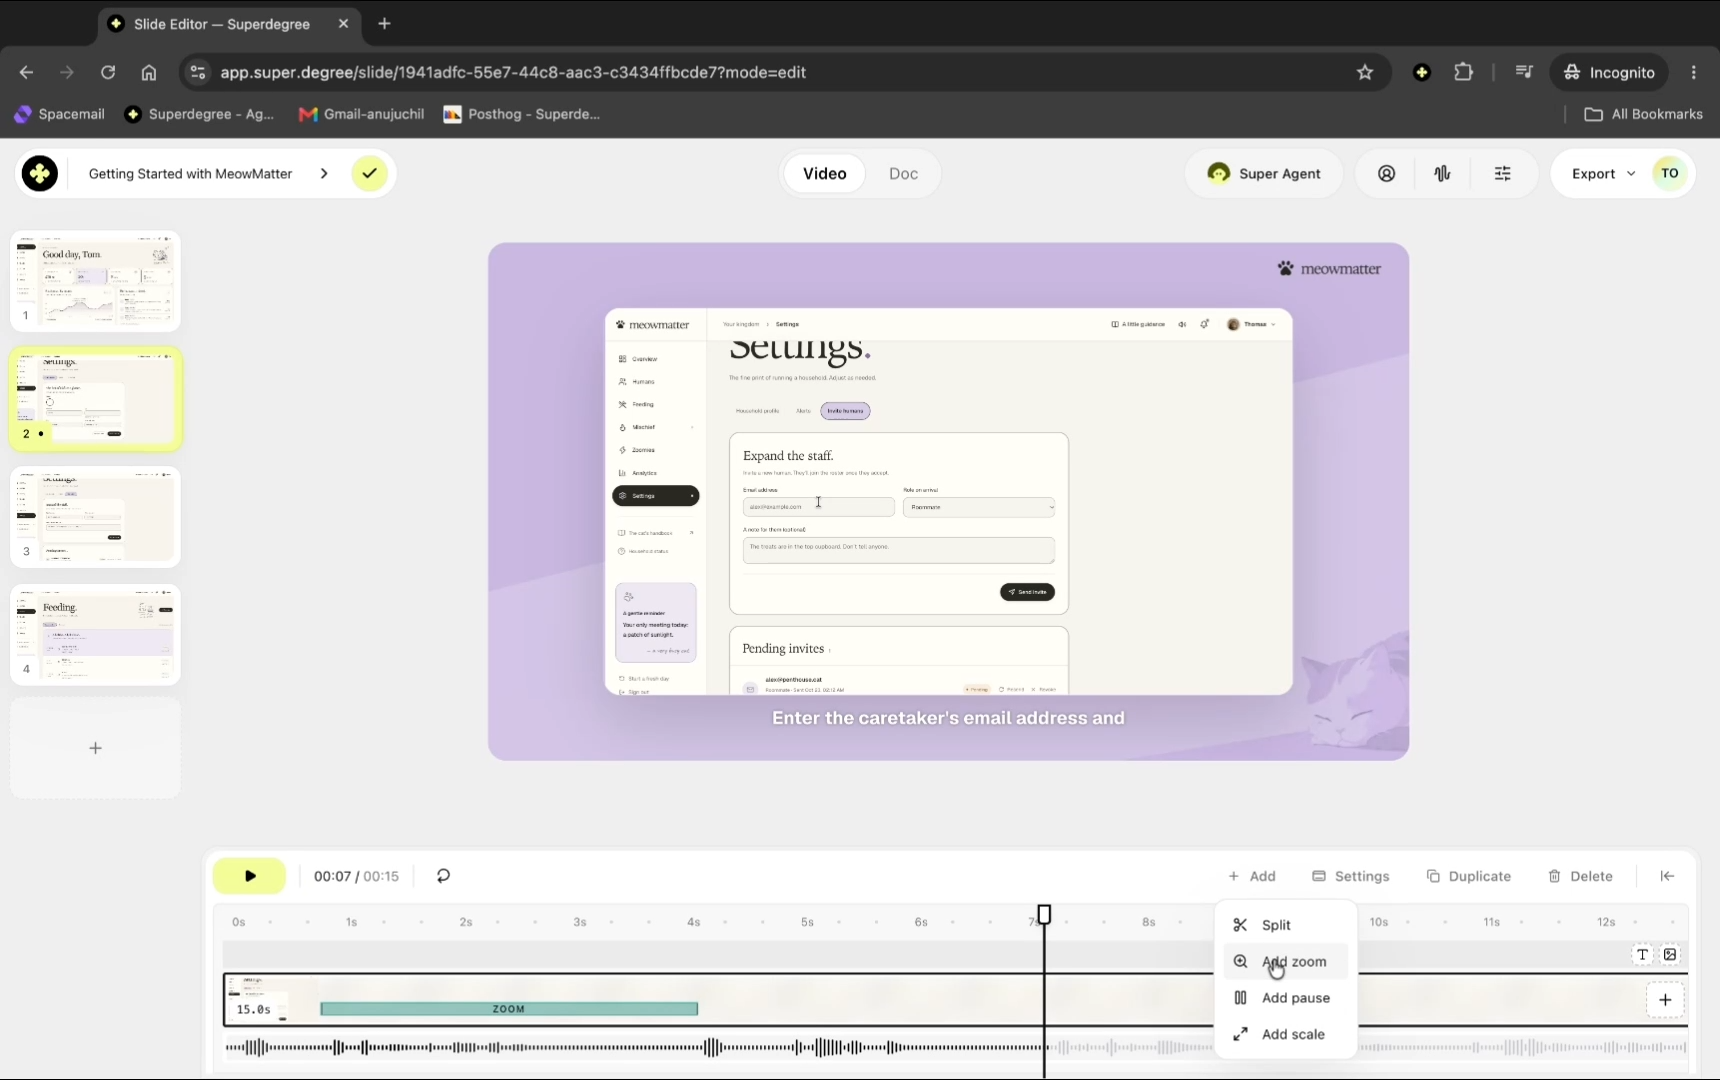
Right-click on the timeline strip at the position where you want a zoom to appear, then select Add zoom from the context menu.
Configure the new zoom area and timing
Drag the handles on the preview screen to frame the target area, adjust the strip duration on the timeline as needed, and click Done to apply the zoom.
Remove an existing zoom
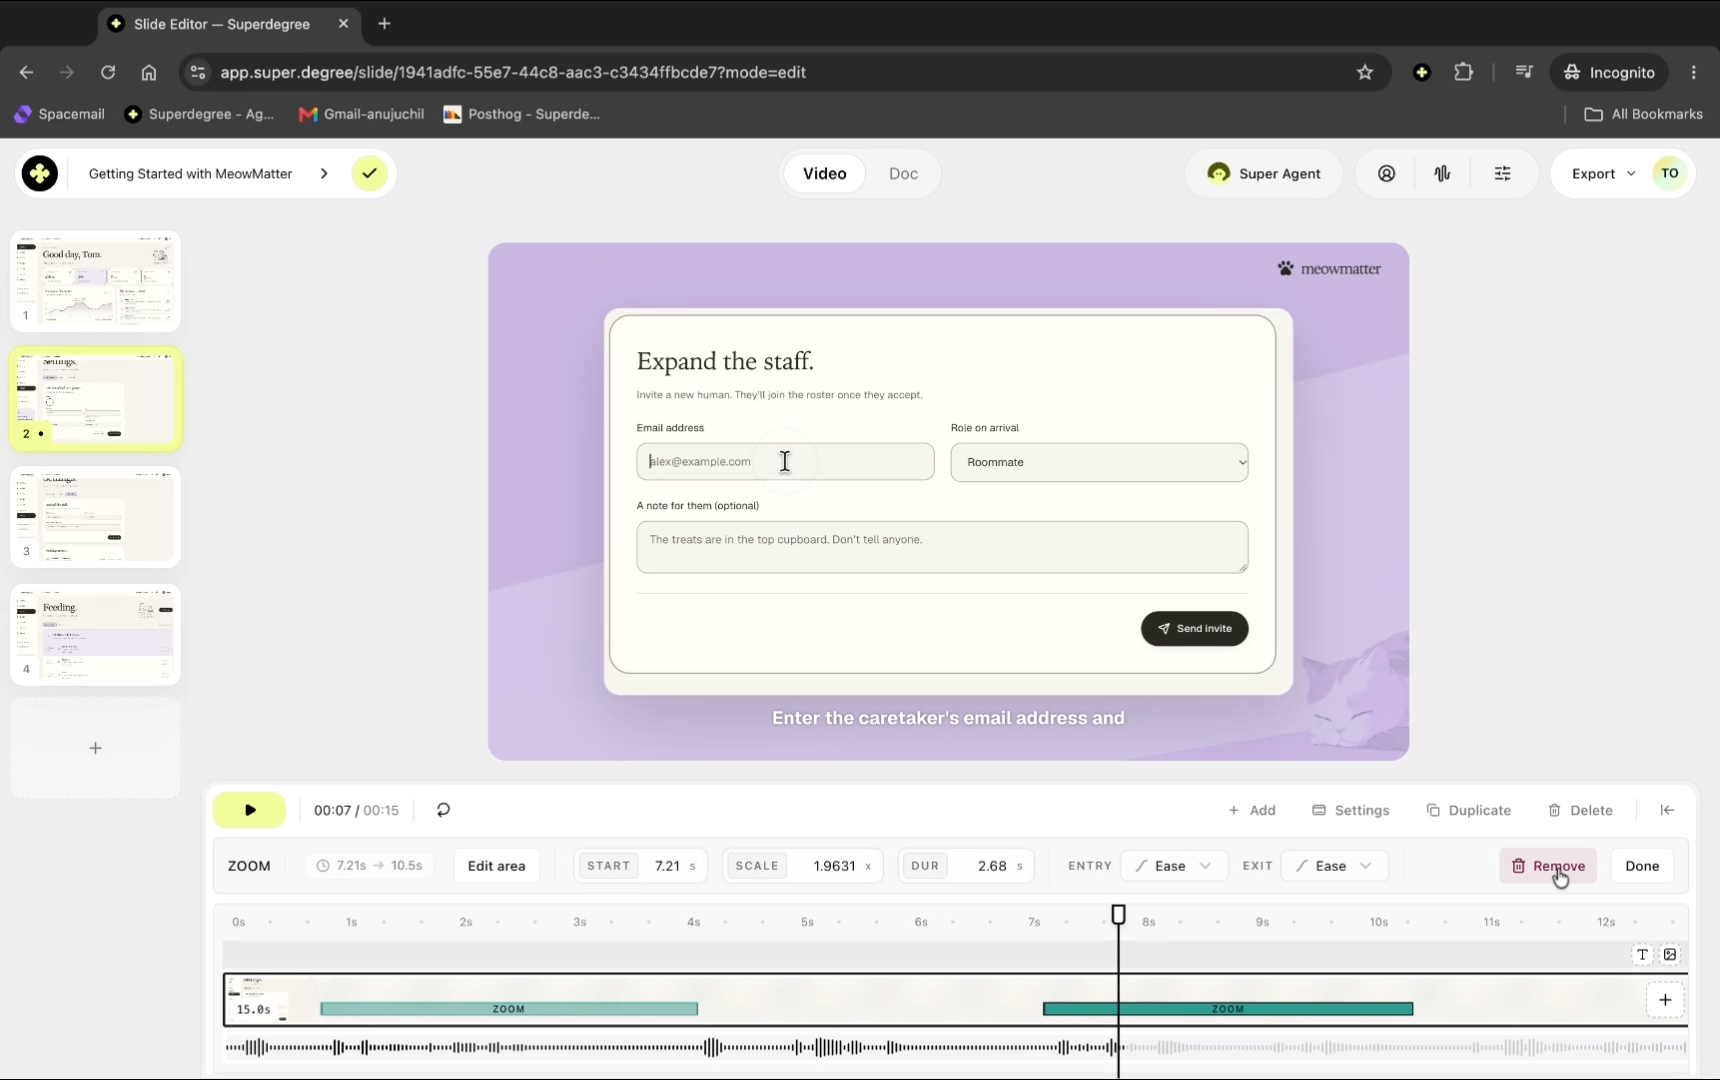
Select the blue Zoom strip on the timeline you wish to delete, then click Remove zoom in the sidebar panel to delete it.
Result
The timeline updates immediately, showing your customized zoom configurations and removing any deleted zoom blocks from the slide editor.