

Video Editor · Article 10 of 18
Cropping Video Pages
Overview
This walkthrough explains how to crop video frames in the Superdegree Slide Editor. Users can apply frame cropping globally across all slides in a project or customize the crop boundary for an individual slide page. The process takes place directly inside the Slide Editor interface.
Steps
Step 1 — Open global settings
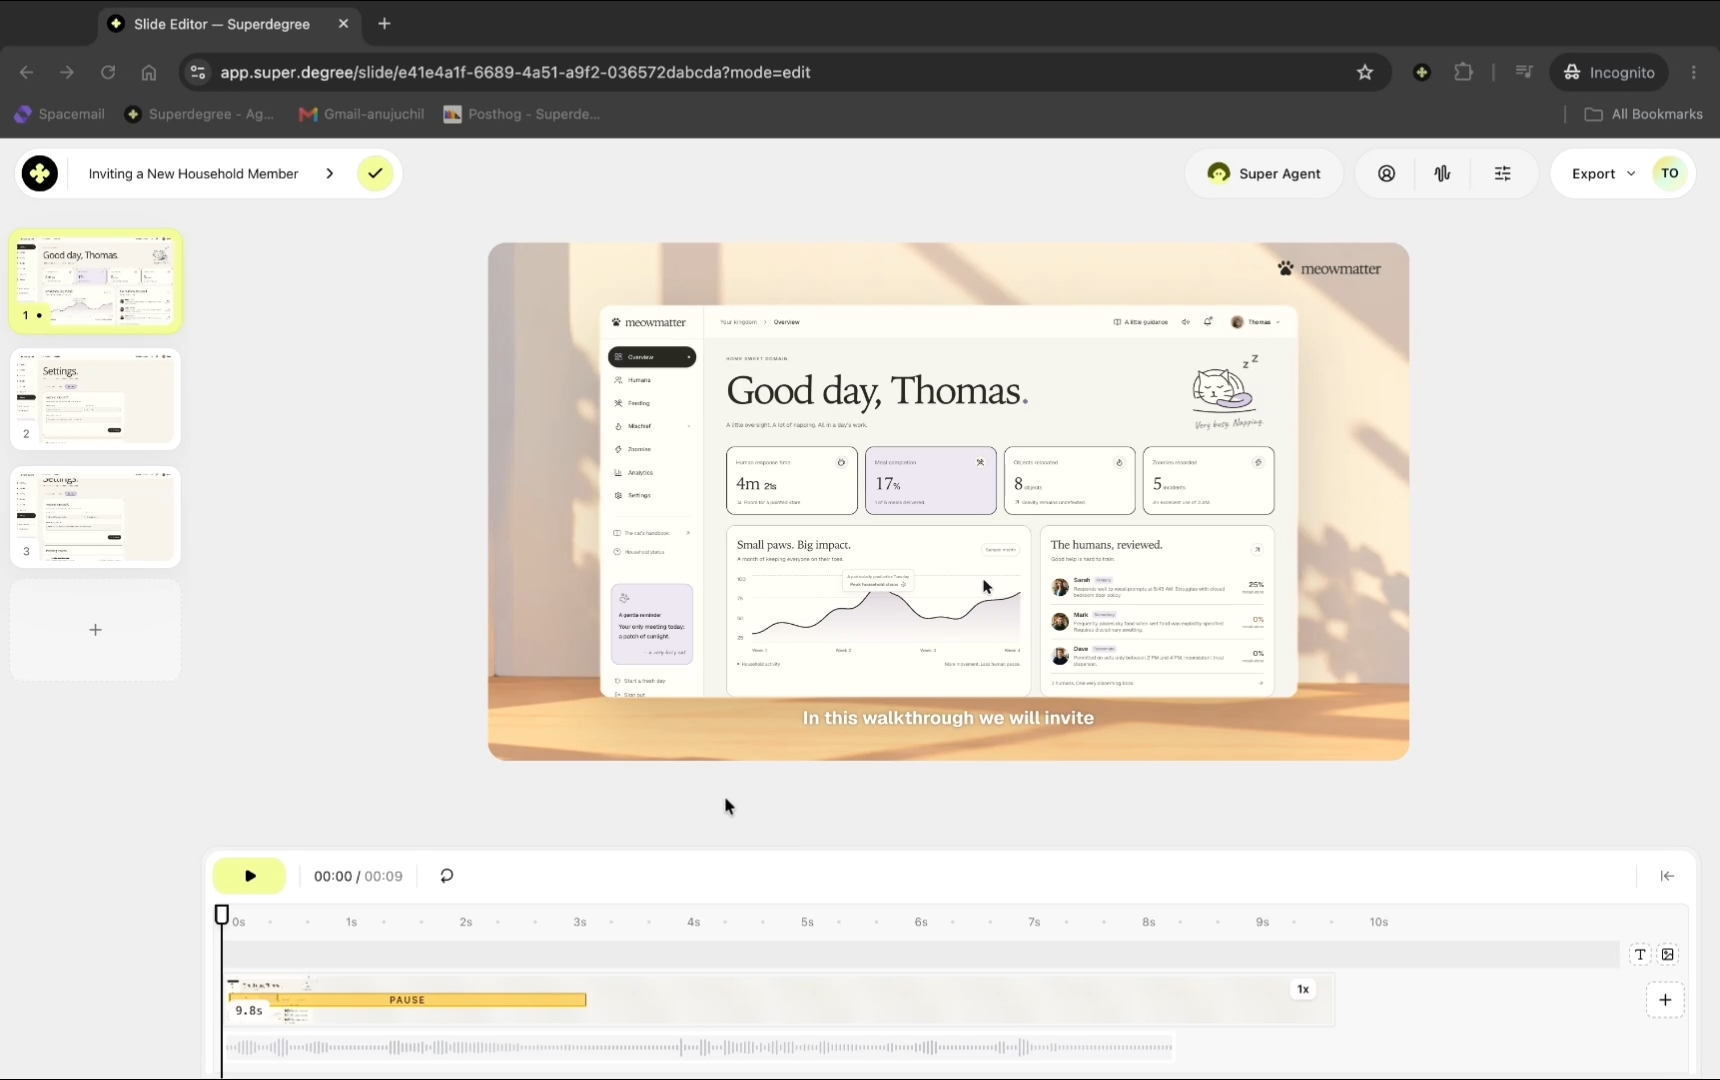
In the Slide Editor, click the settings icon on the right toolbar to open the global project settings panel.
Step 2 — Enable global crop
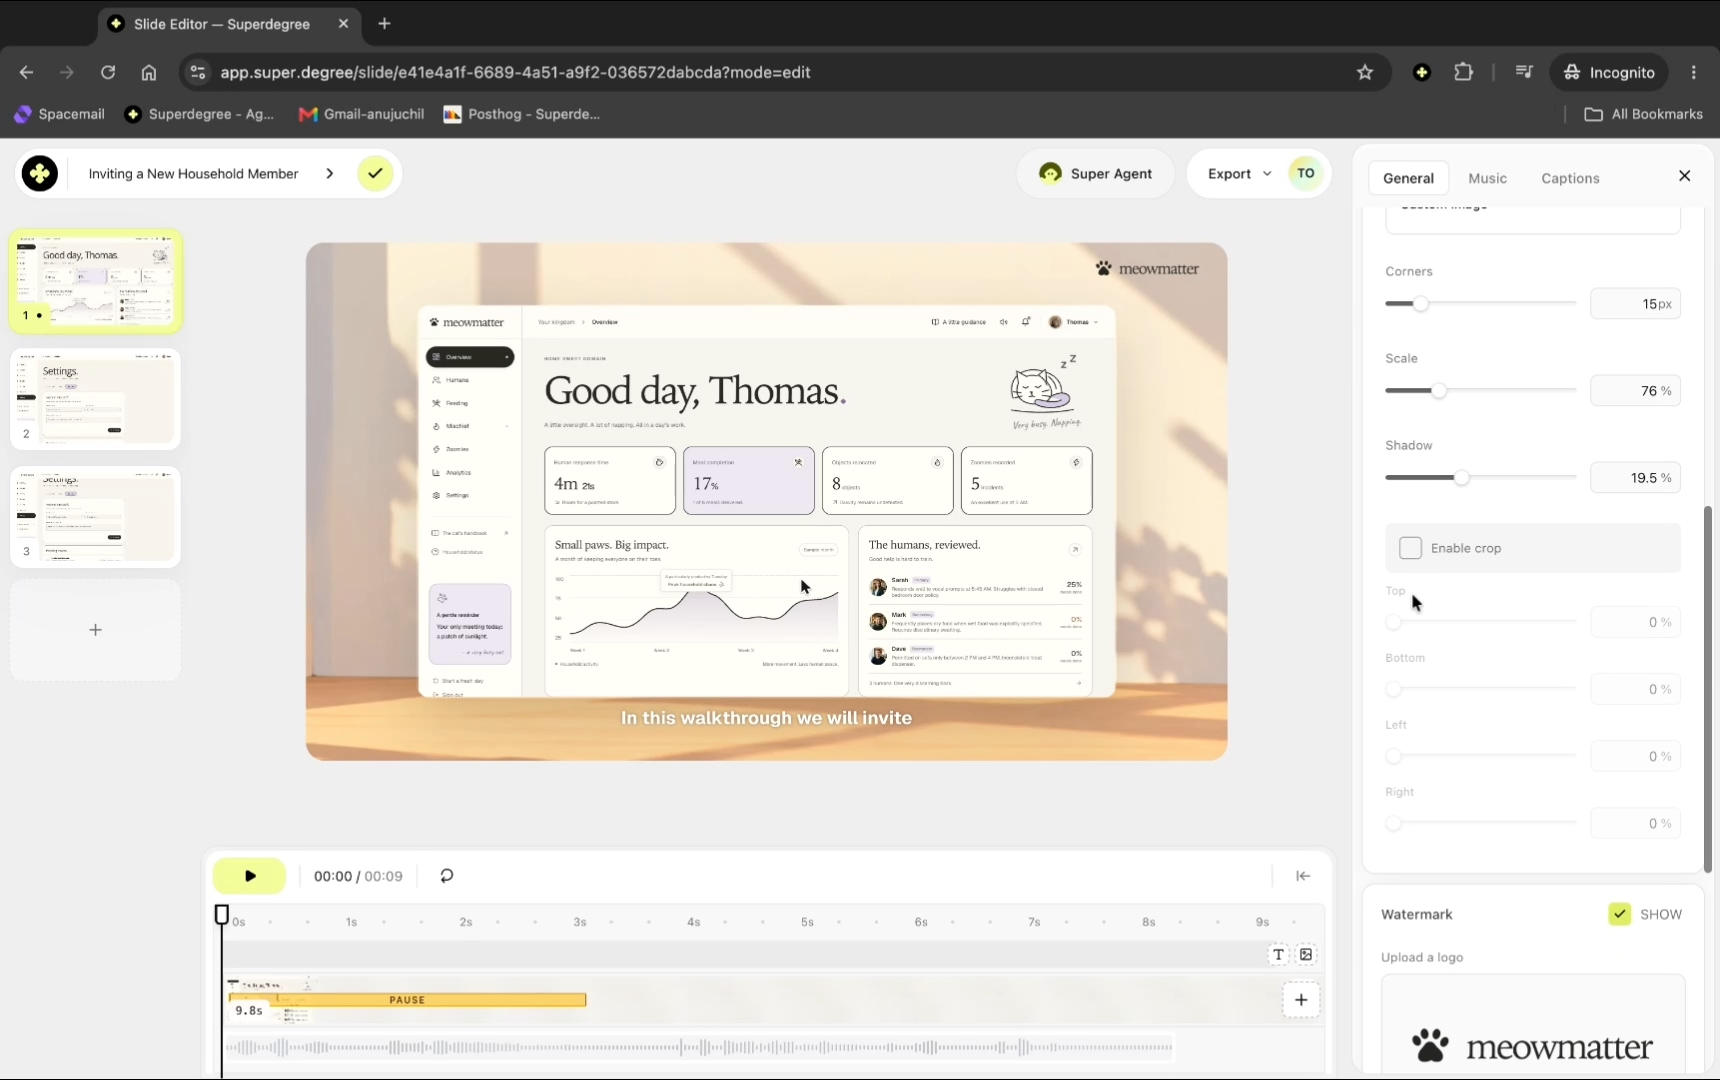
In the settings panel, locate the Enable crop toggle and switch it on to activate crop handles across all pages.
Step 3 — Adjust global crop handles
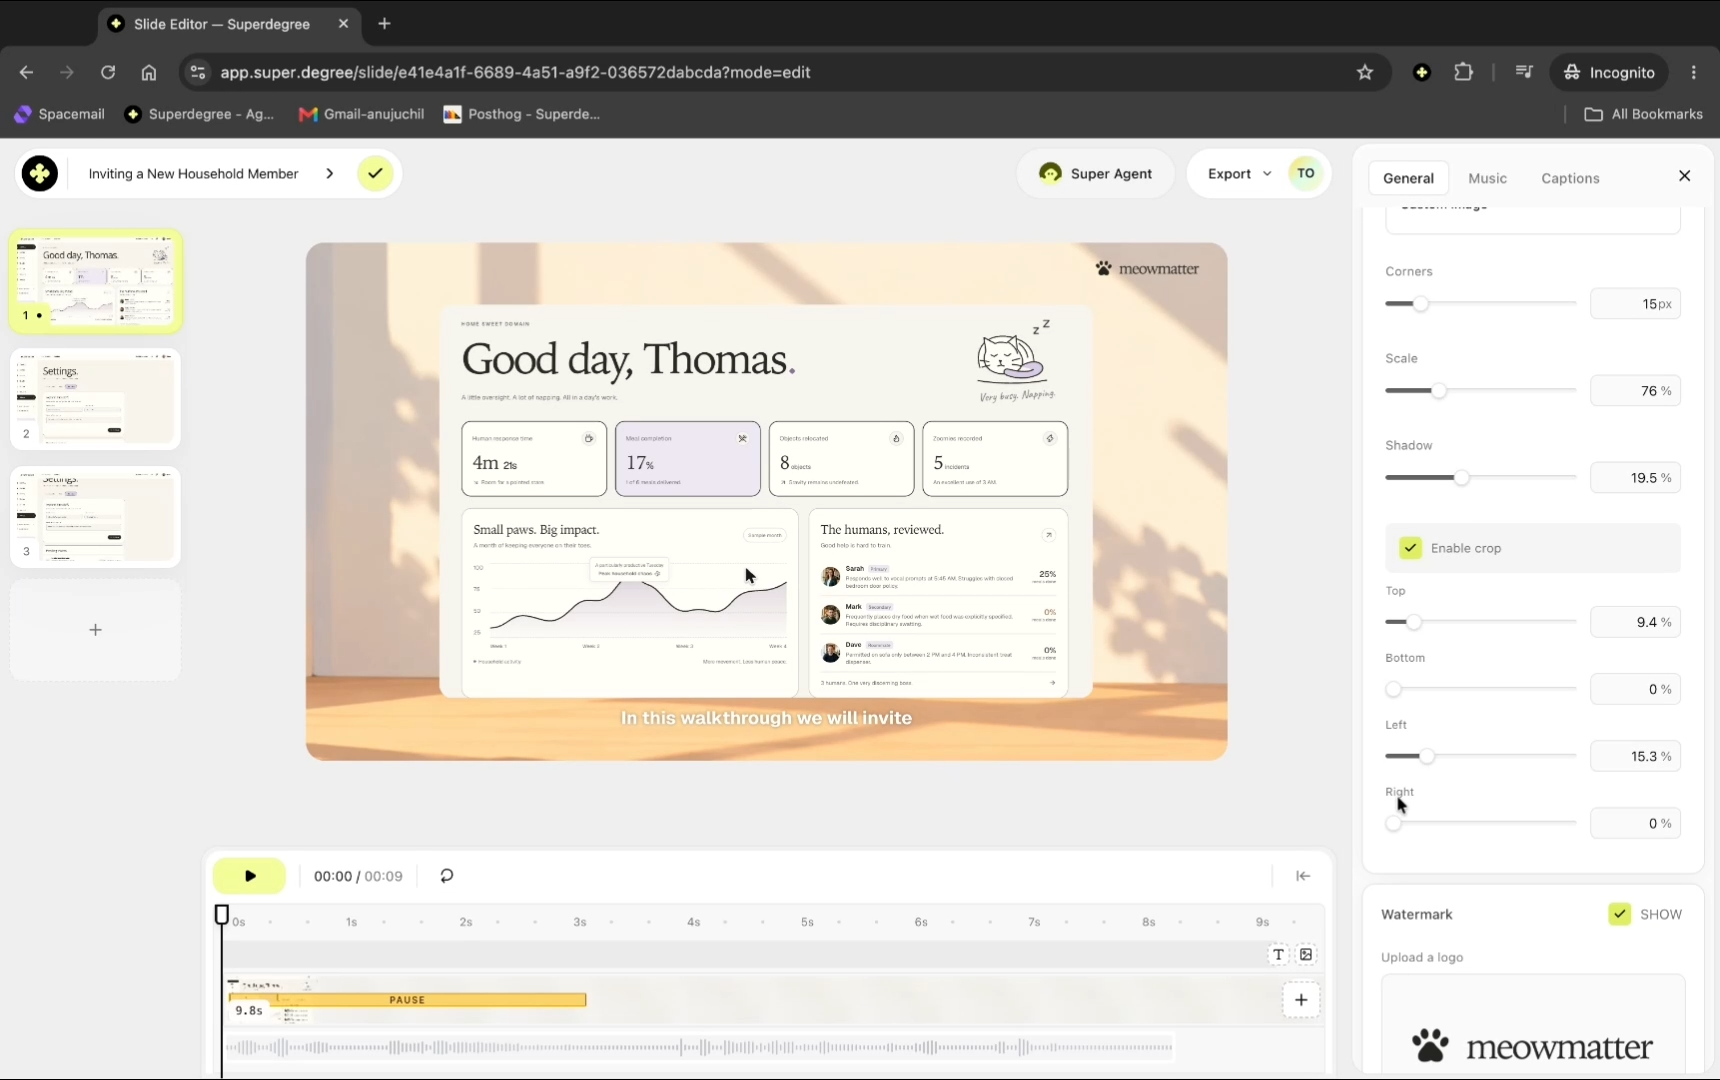
Drag the boundary levers on the canvas frame inward to crop out unwanted areas, such as sidebars or top navigation bars.
Step 5 — Select an individual slide and edit frame
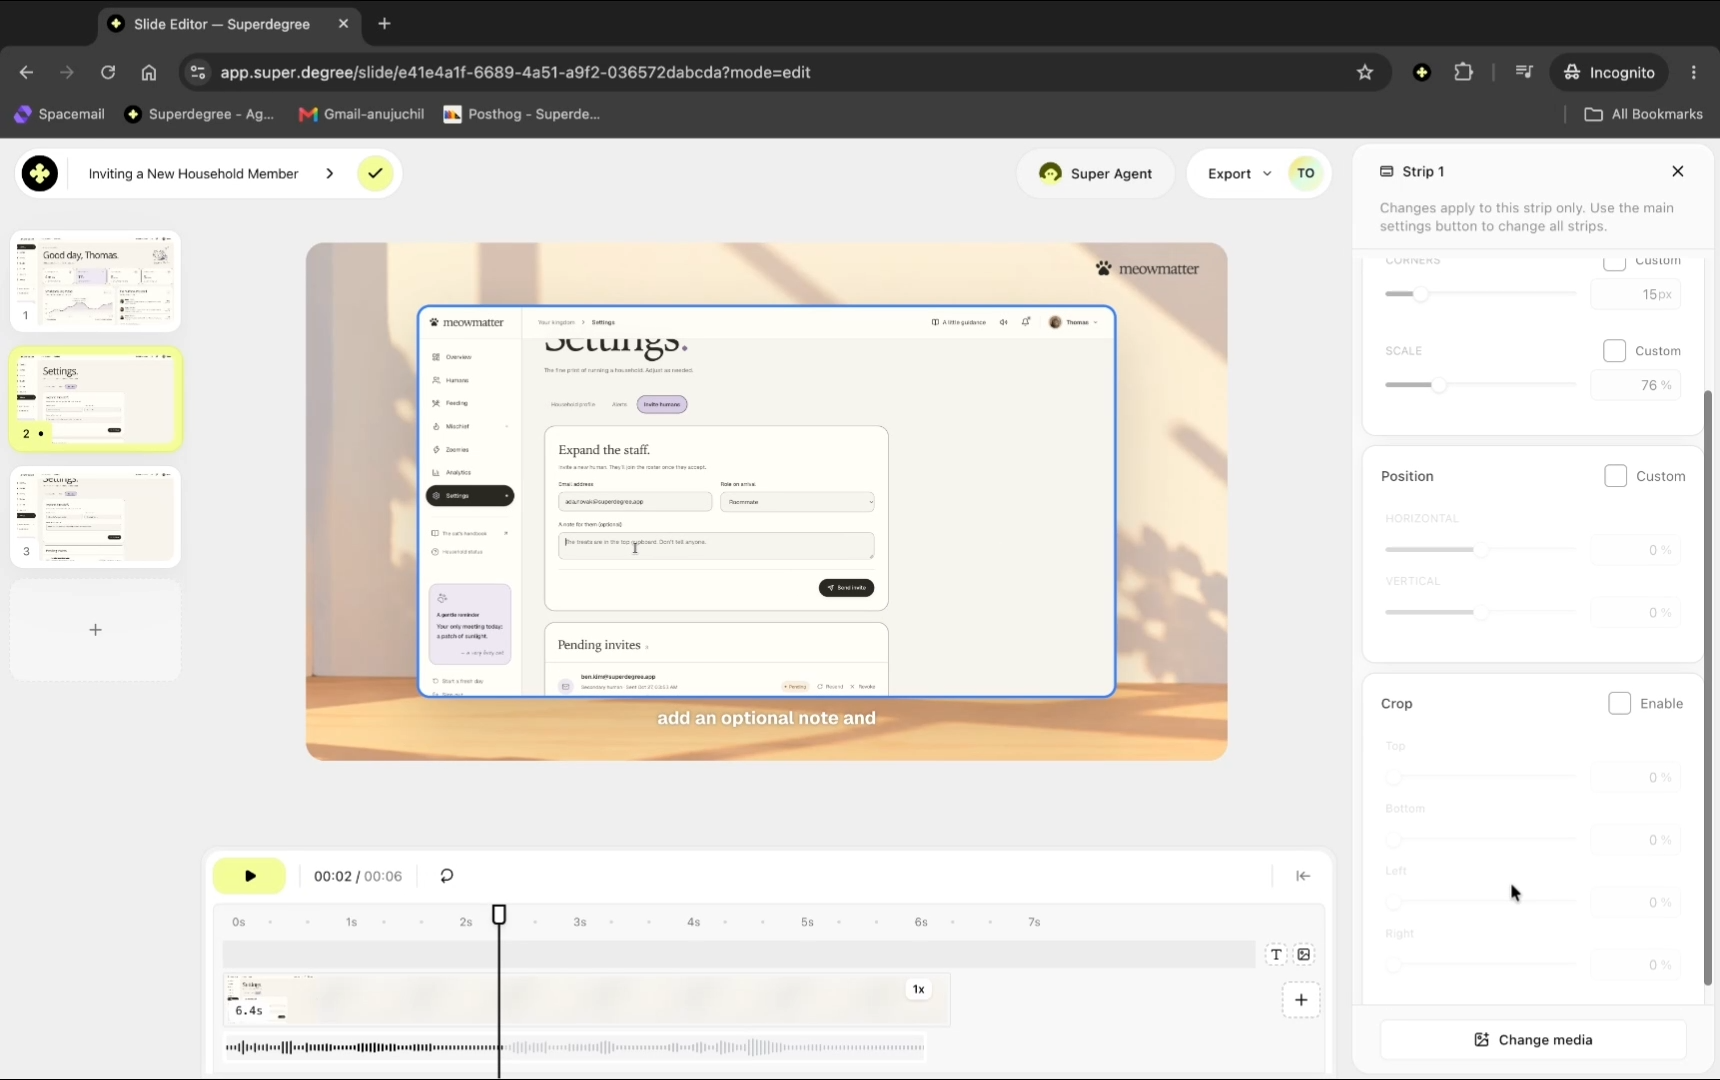
Select the target slide on the timeline, click on the video frame, and select Edit video frame from the floating action menu.
Step 6 — Enable and adjust page-level crop
In the slide configuration panel, toggle Enable under the crop section, then drag the frame sliders to crop only that specific slide.
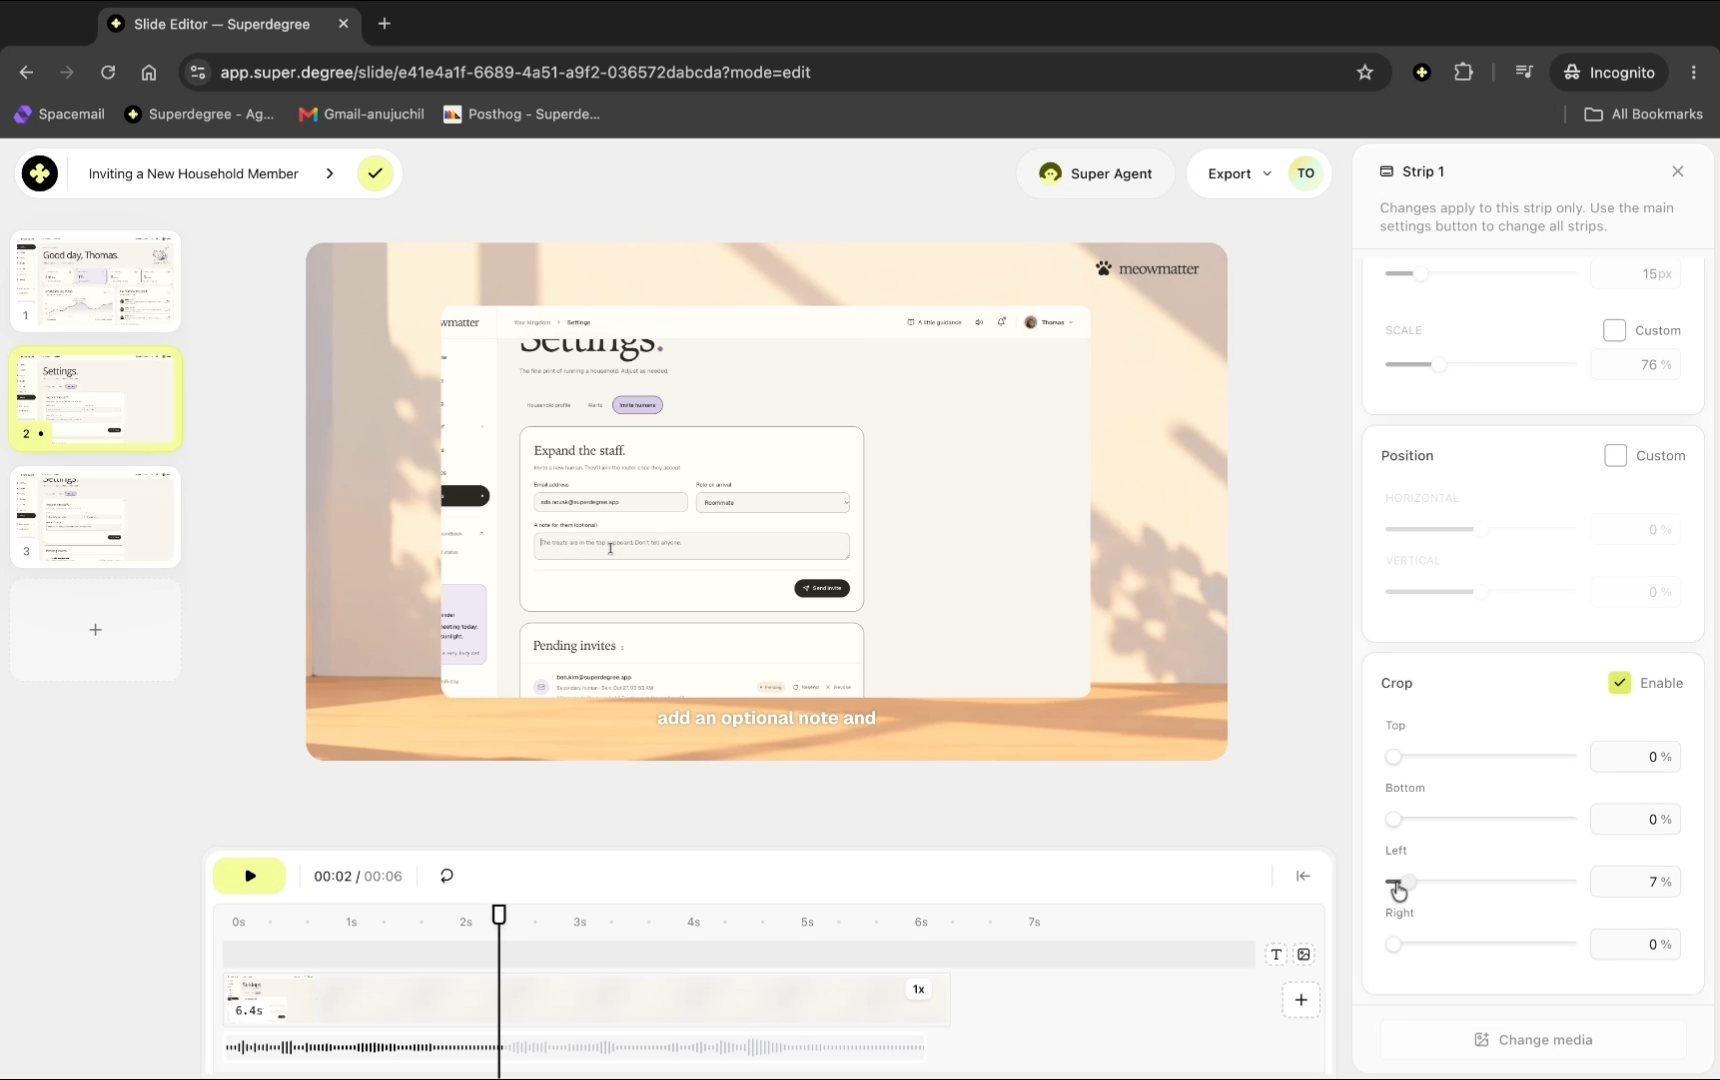
Result
The Slide Editor displays the selected slide with the video frame cropped to the custom area, while leaving other pages unaffected.
Notes
Cropping can be applied globally to update every slide simultaneously or at the individual frame level for precise single-slide adjustments.