

MCP Integration · Article 18 of 18
Connecting Claude Code via MCP Integration
Overview
Superdegree's MCP Integration connects coding tools such as Claude Code or Cursor to Superdegree's Ask agent. Once connected, you can ask for walkthrough videos and written guides from your terminal, review and revise drafts, and search your organisation's content library without leaving your editor. Setup takes a few minutes on the MCP Integration page, which you open from your profile menu. Before you start, make sure you are signed in to Superdegree and have your terminal or coding tool open. If MCP Integration is missing from the menu, Ask is not enabled for your workspace.
Here's how to connect
Step 1 — Open MCP Integration settings
Click your user profile name at the bottom of the left sidebar to open the account menu, then click MCP Integration.
Step 2 — Initiate API key creation
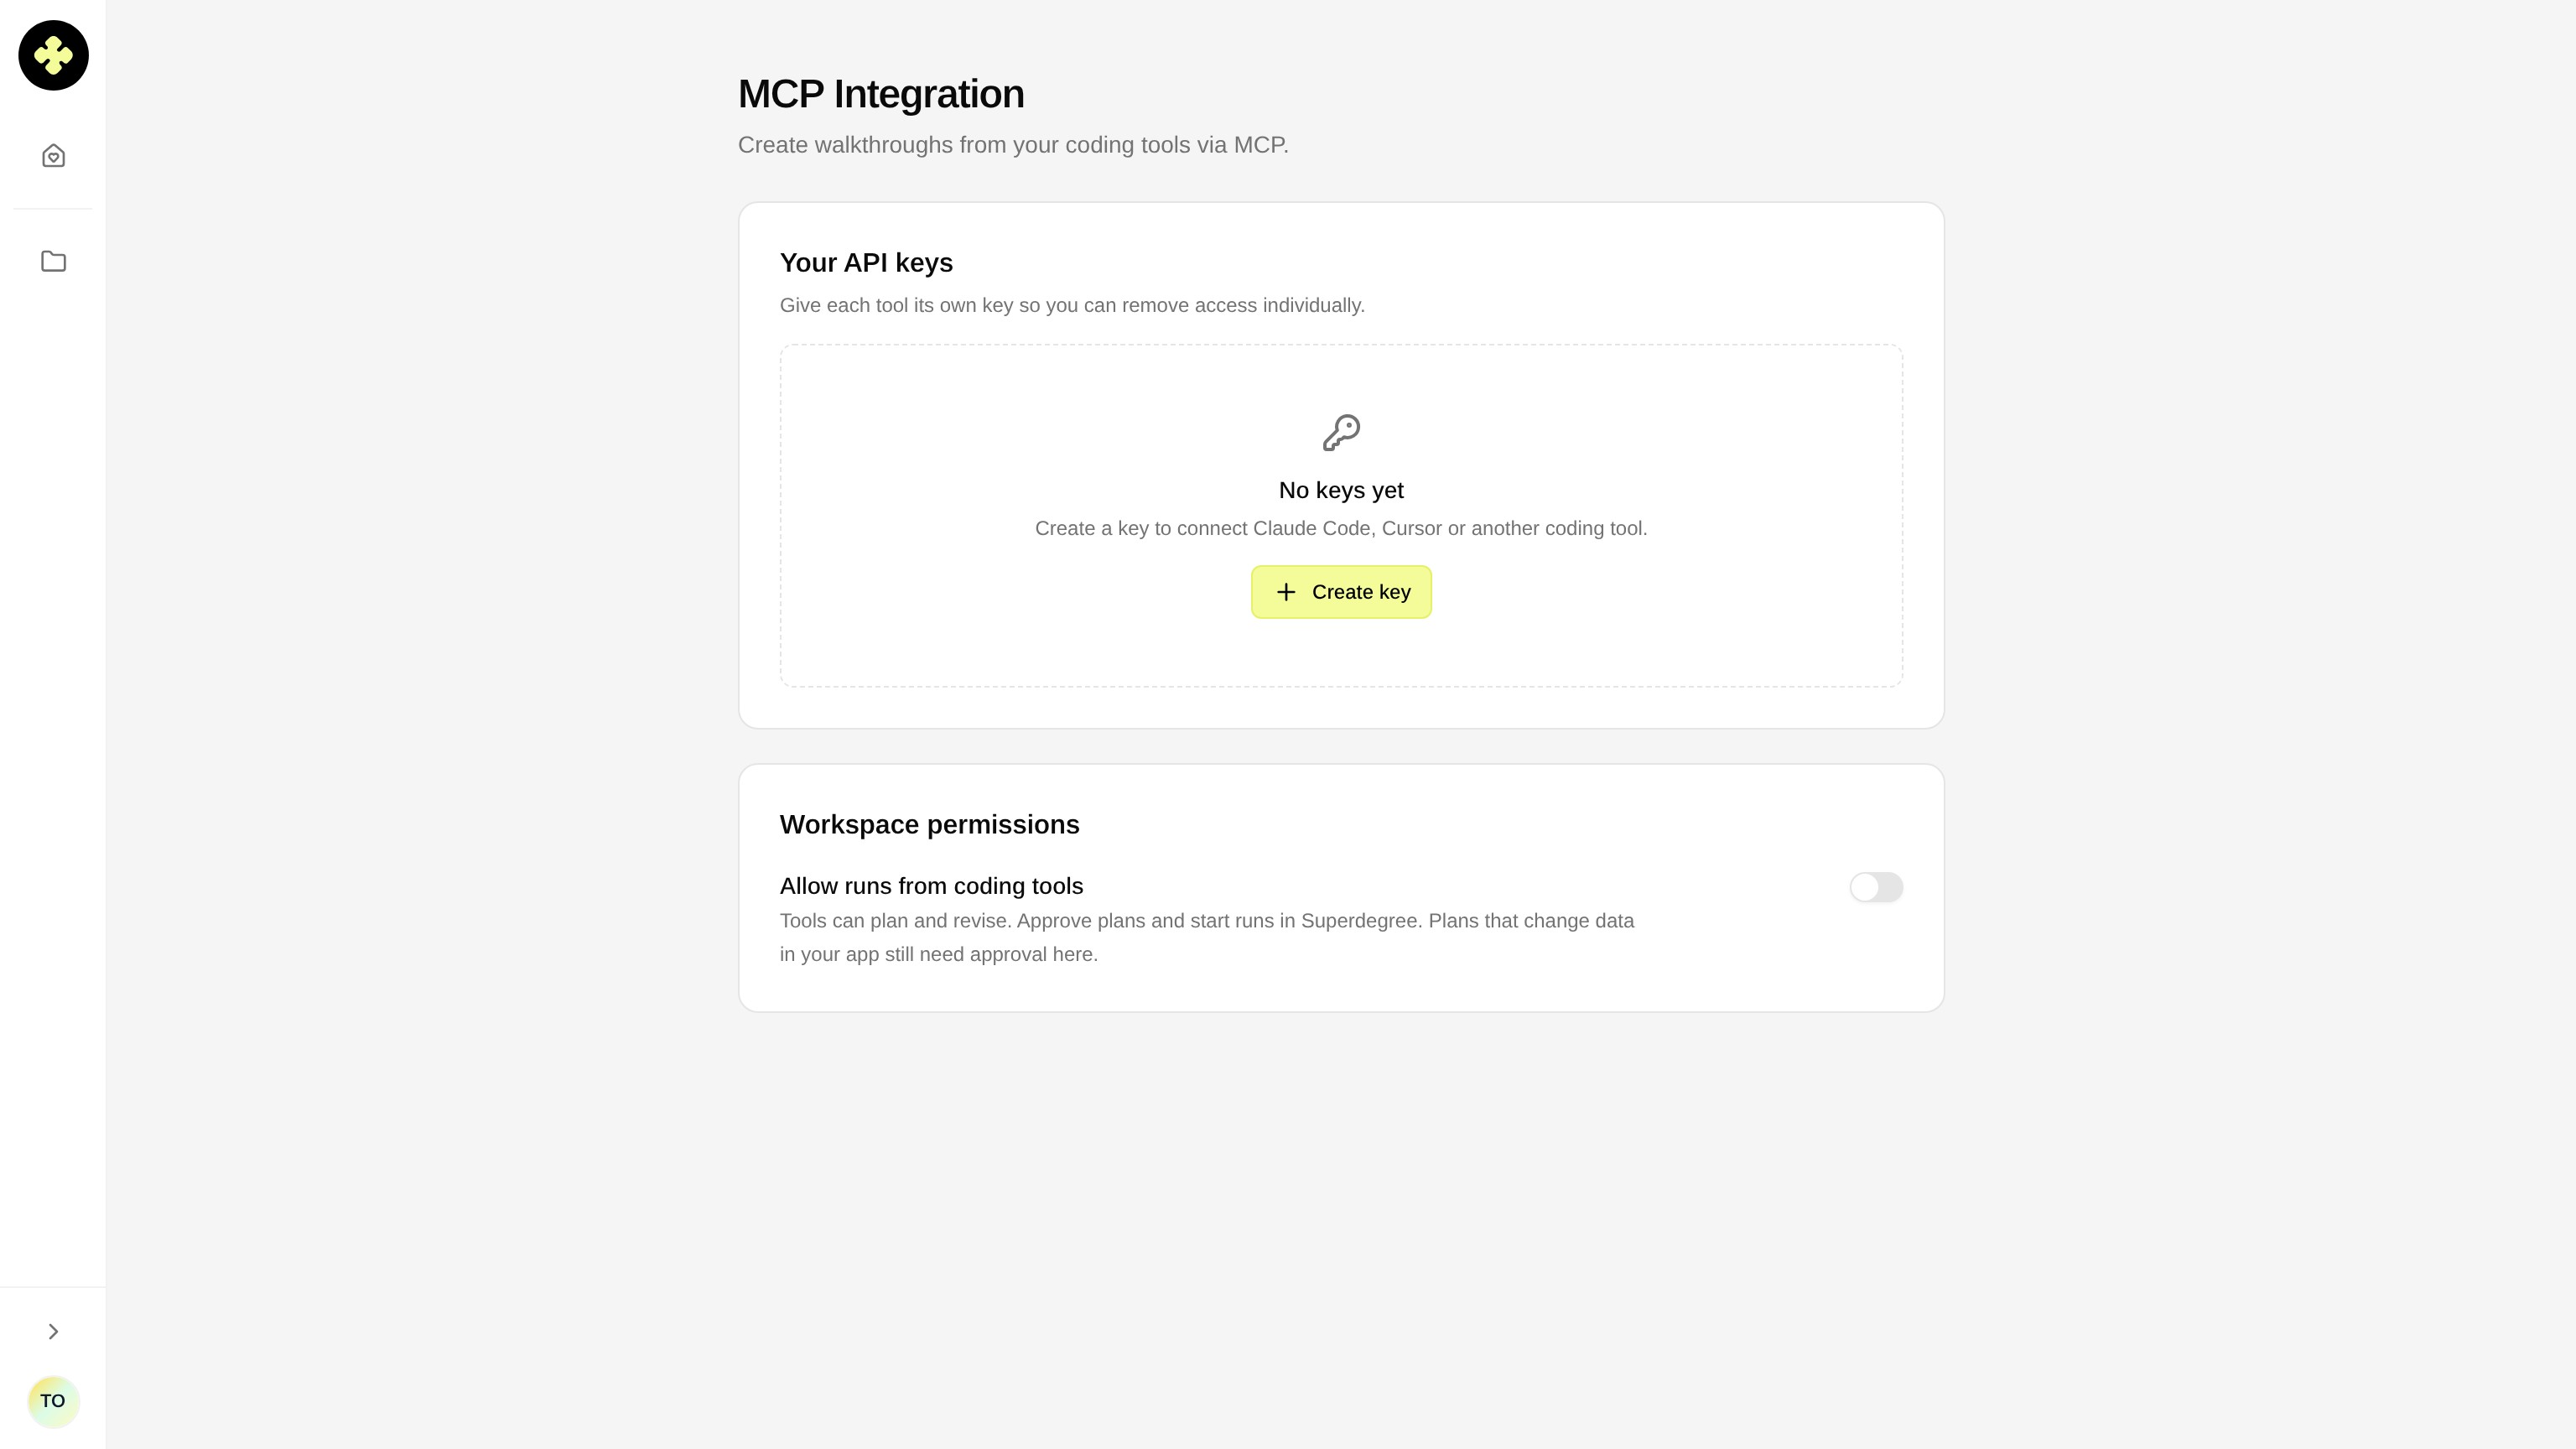
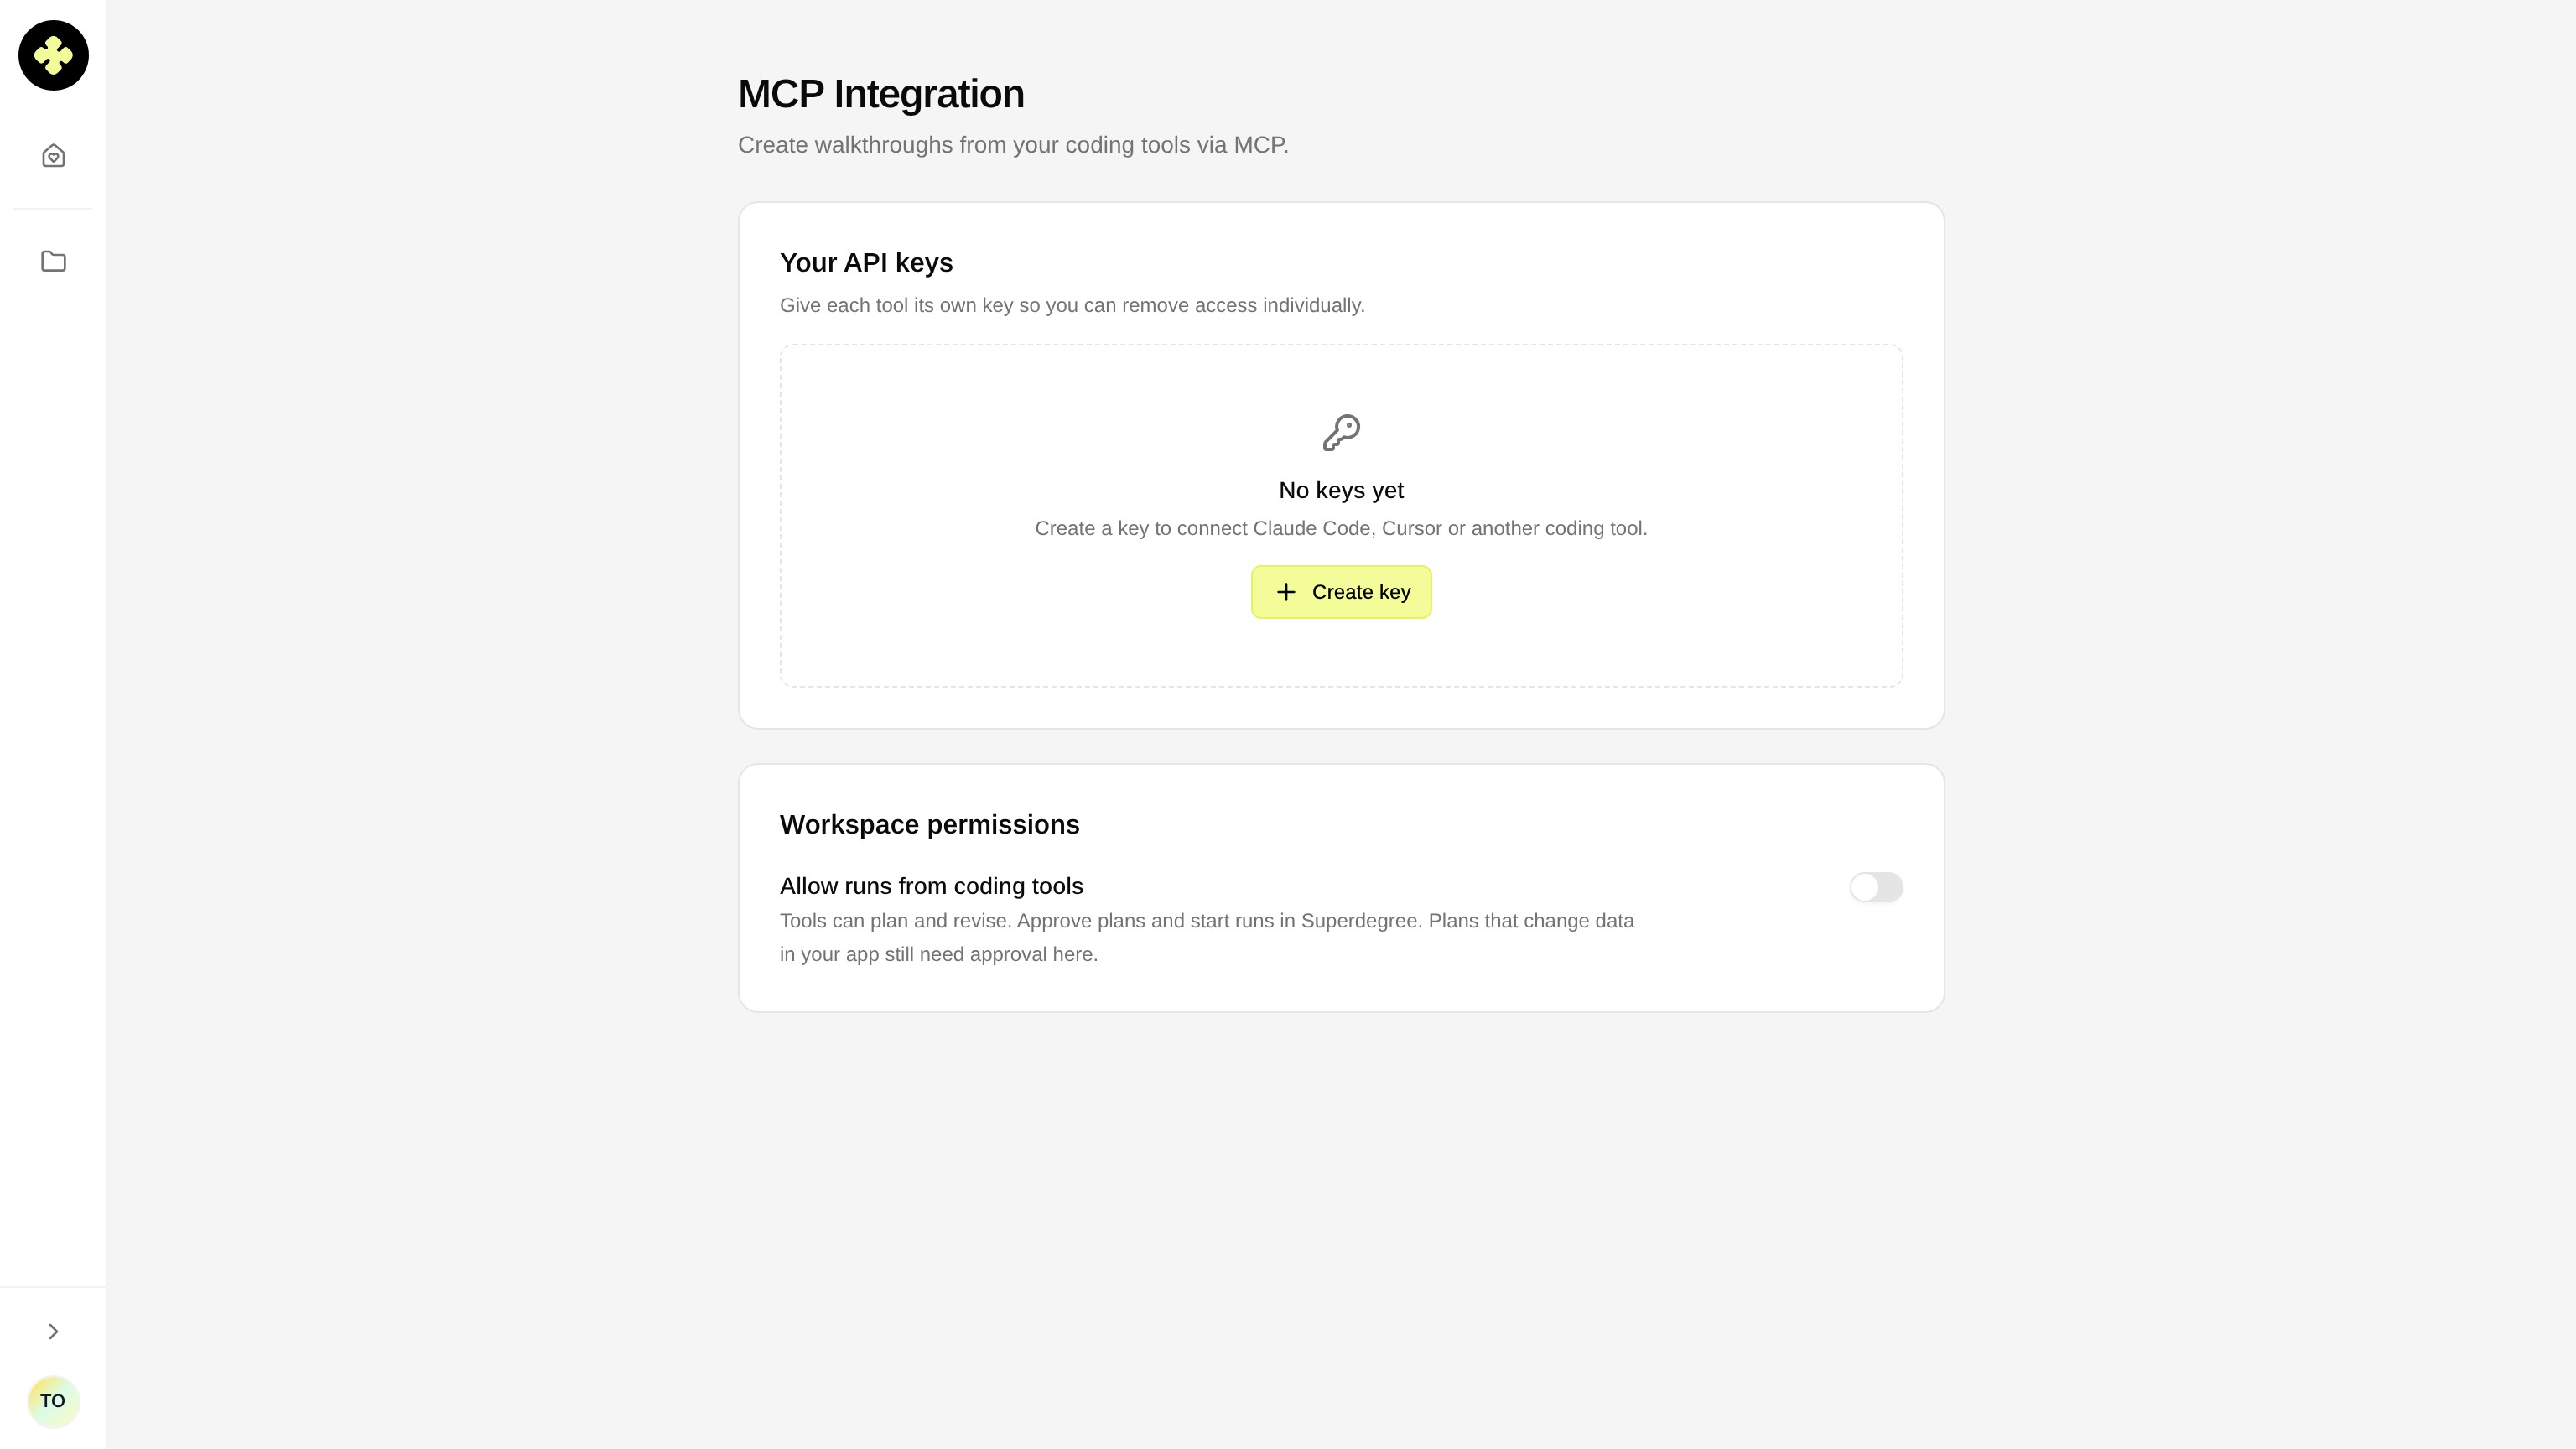
In the Your API keys section, which displays "No keys yet" if no tools are currently linked, click the Create key button to open the configuration dialog. Assigning a dedicated key per tool allows you to revoke access individually.
Step 3 — Name and create the API key
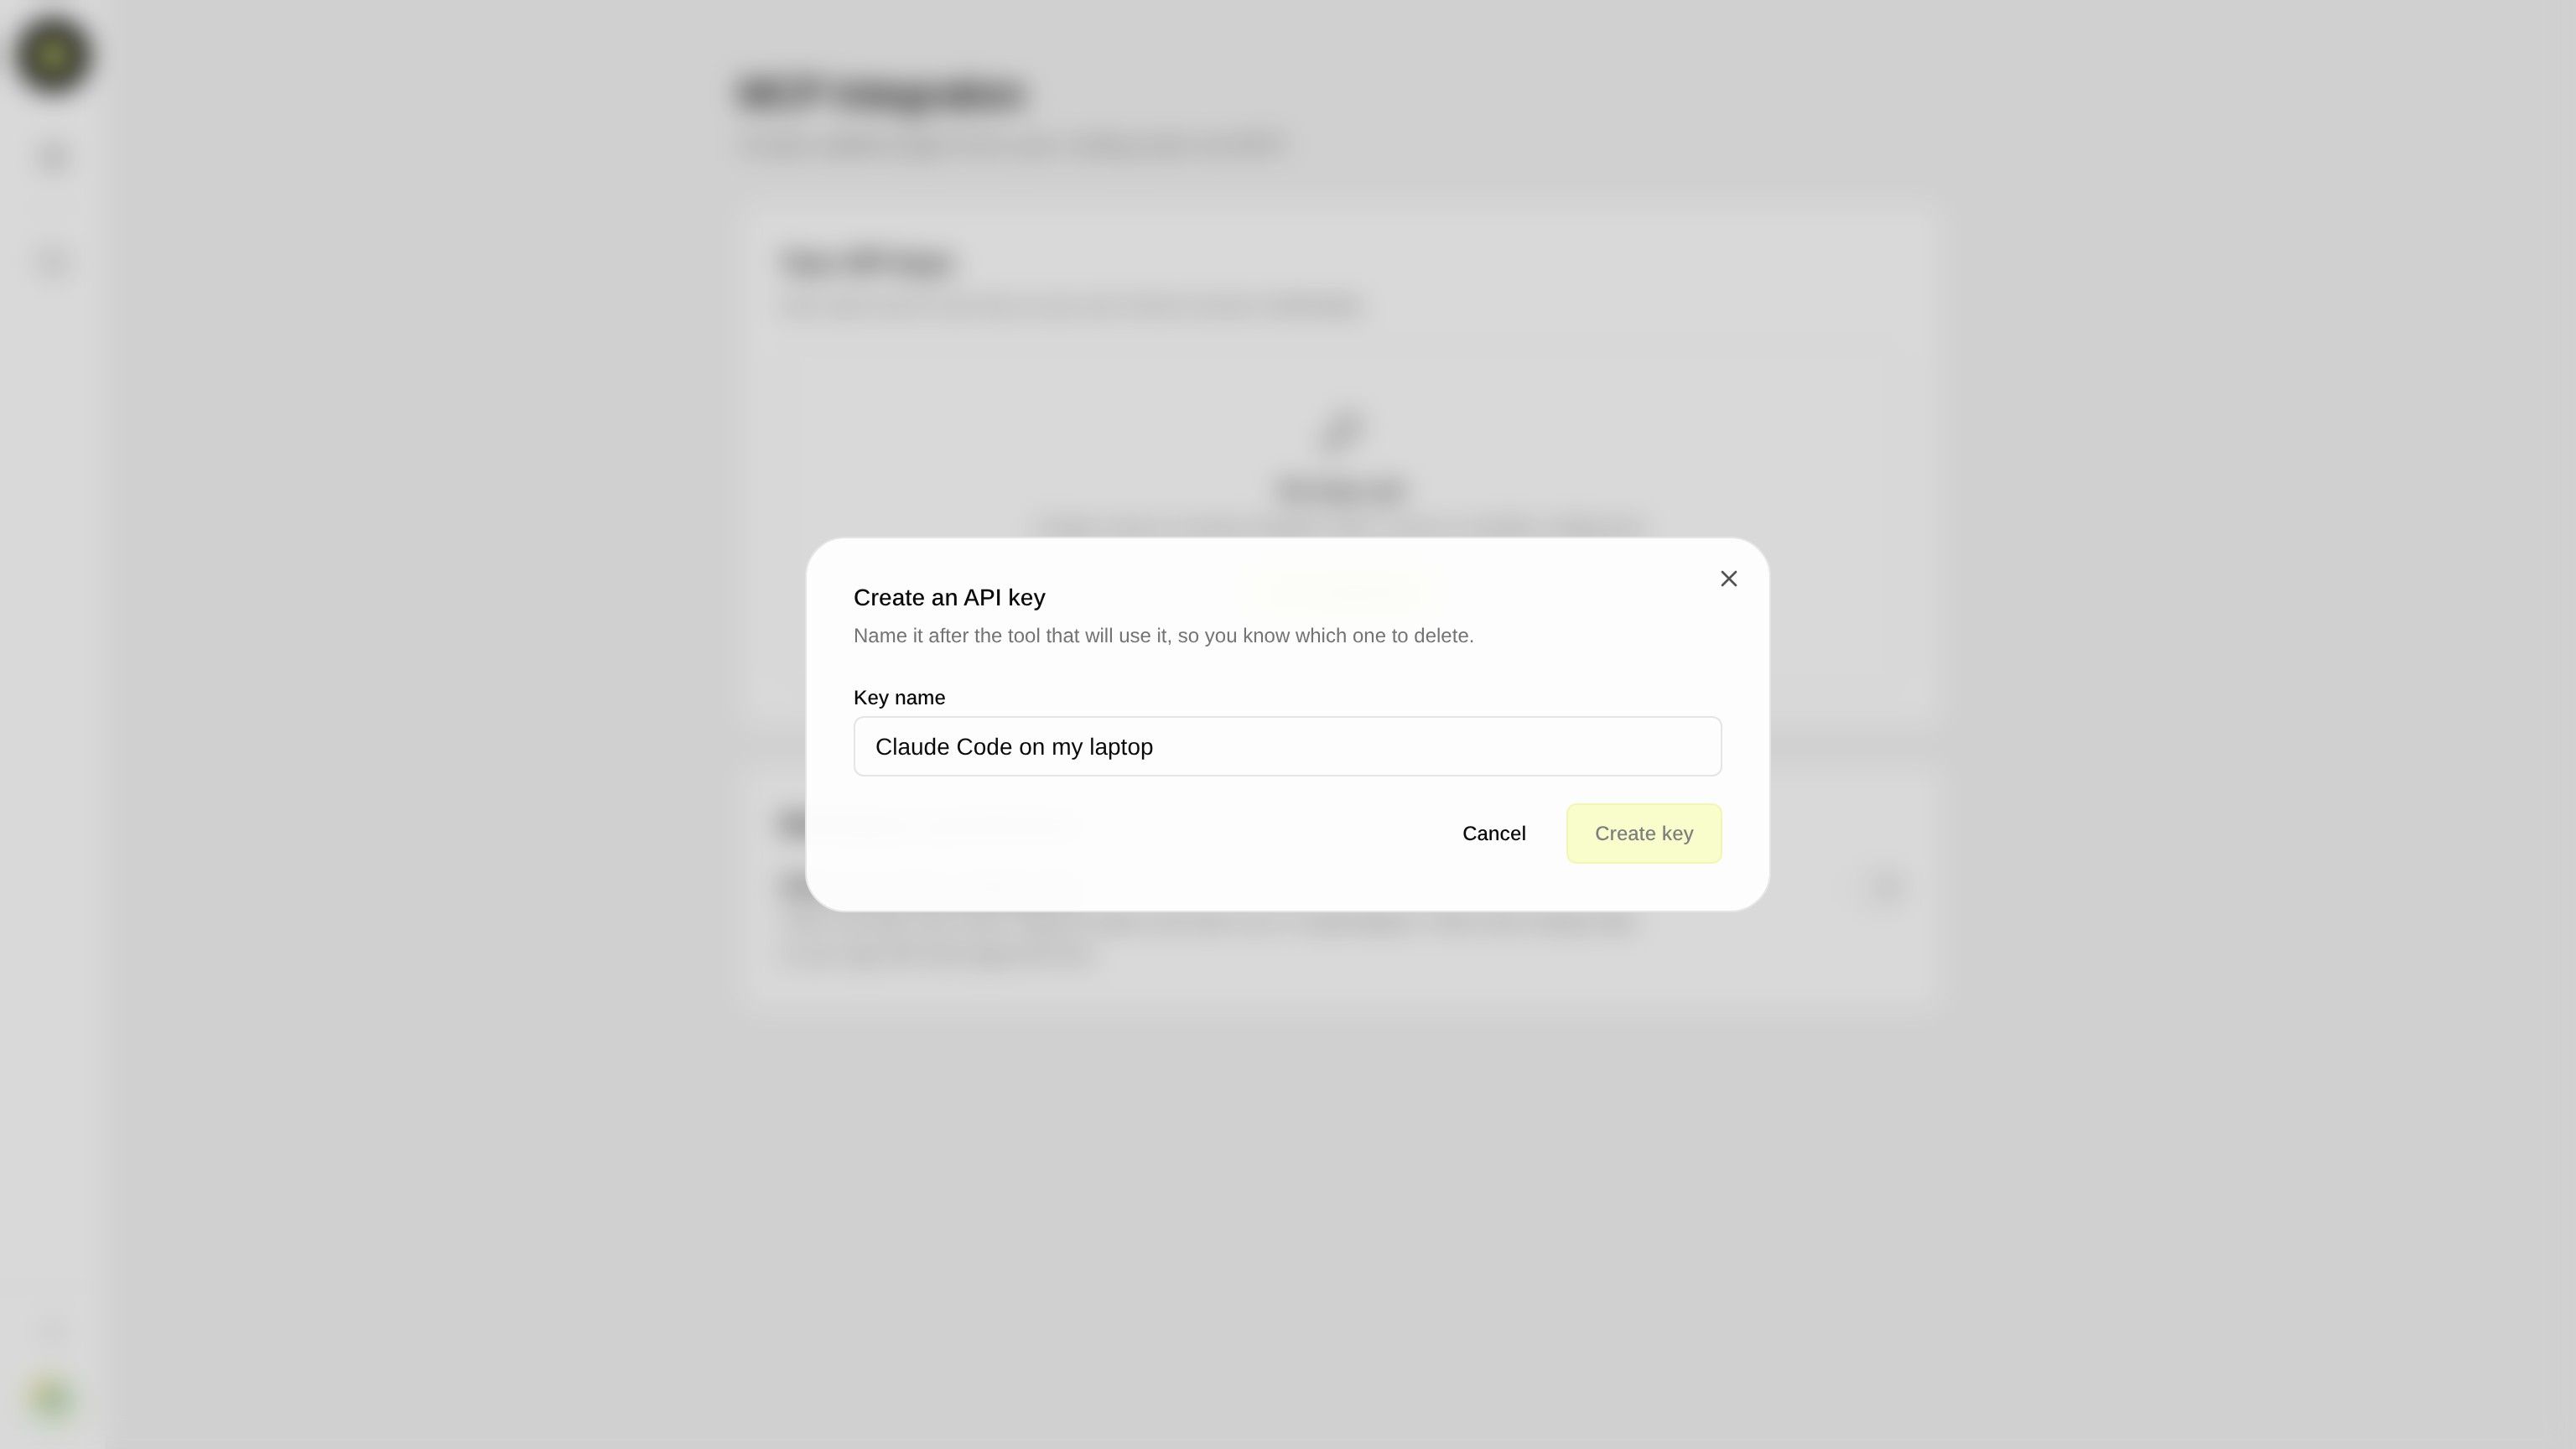
In the Create an API key dialog, type a name in the Key name field and click Create key. Name the key after the tool and machine that will use it, such as Claude Code on my laptop, so you know which key to delete later.
Step 4 — Copy the generated API key
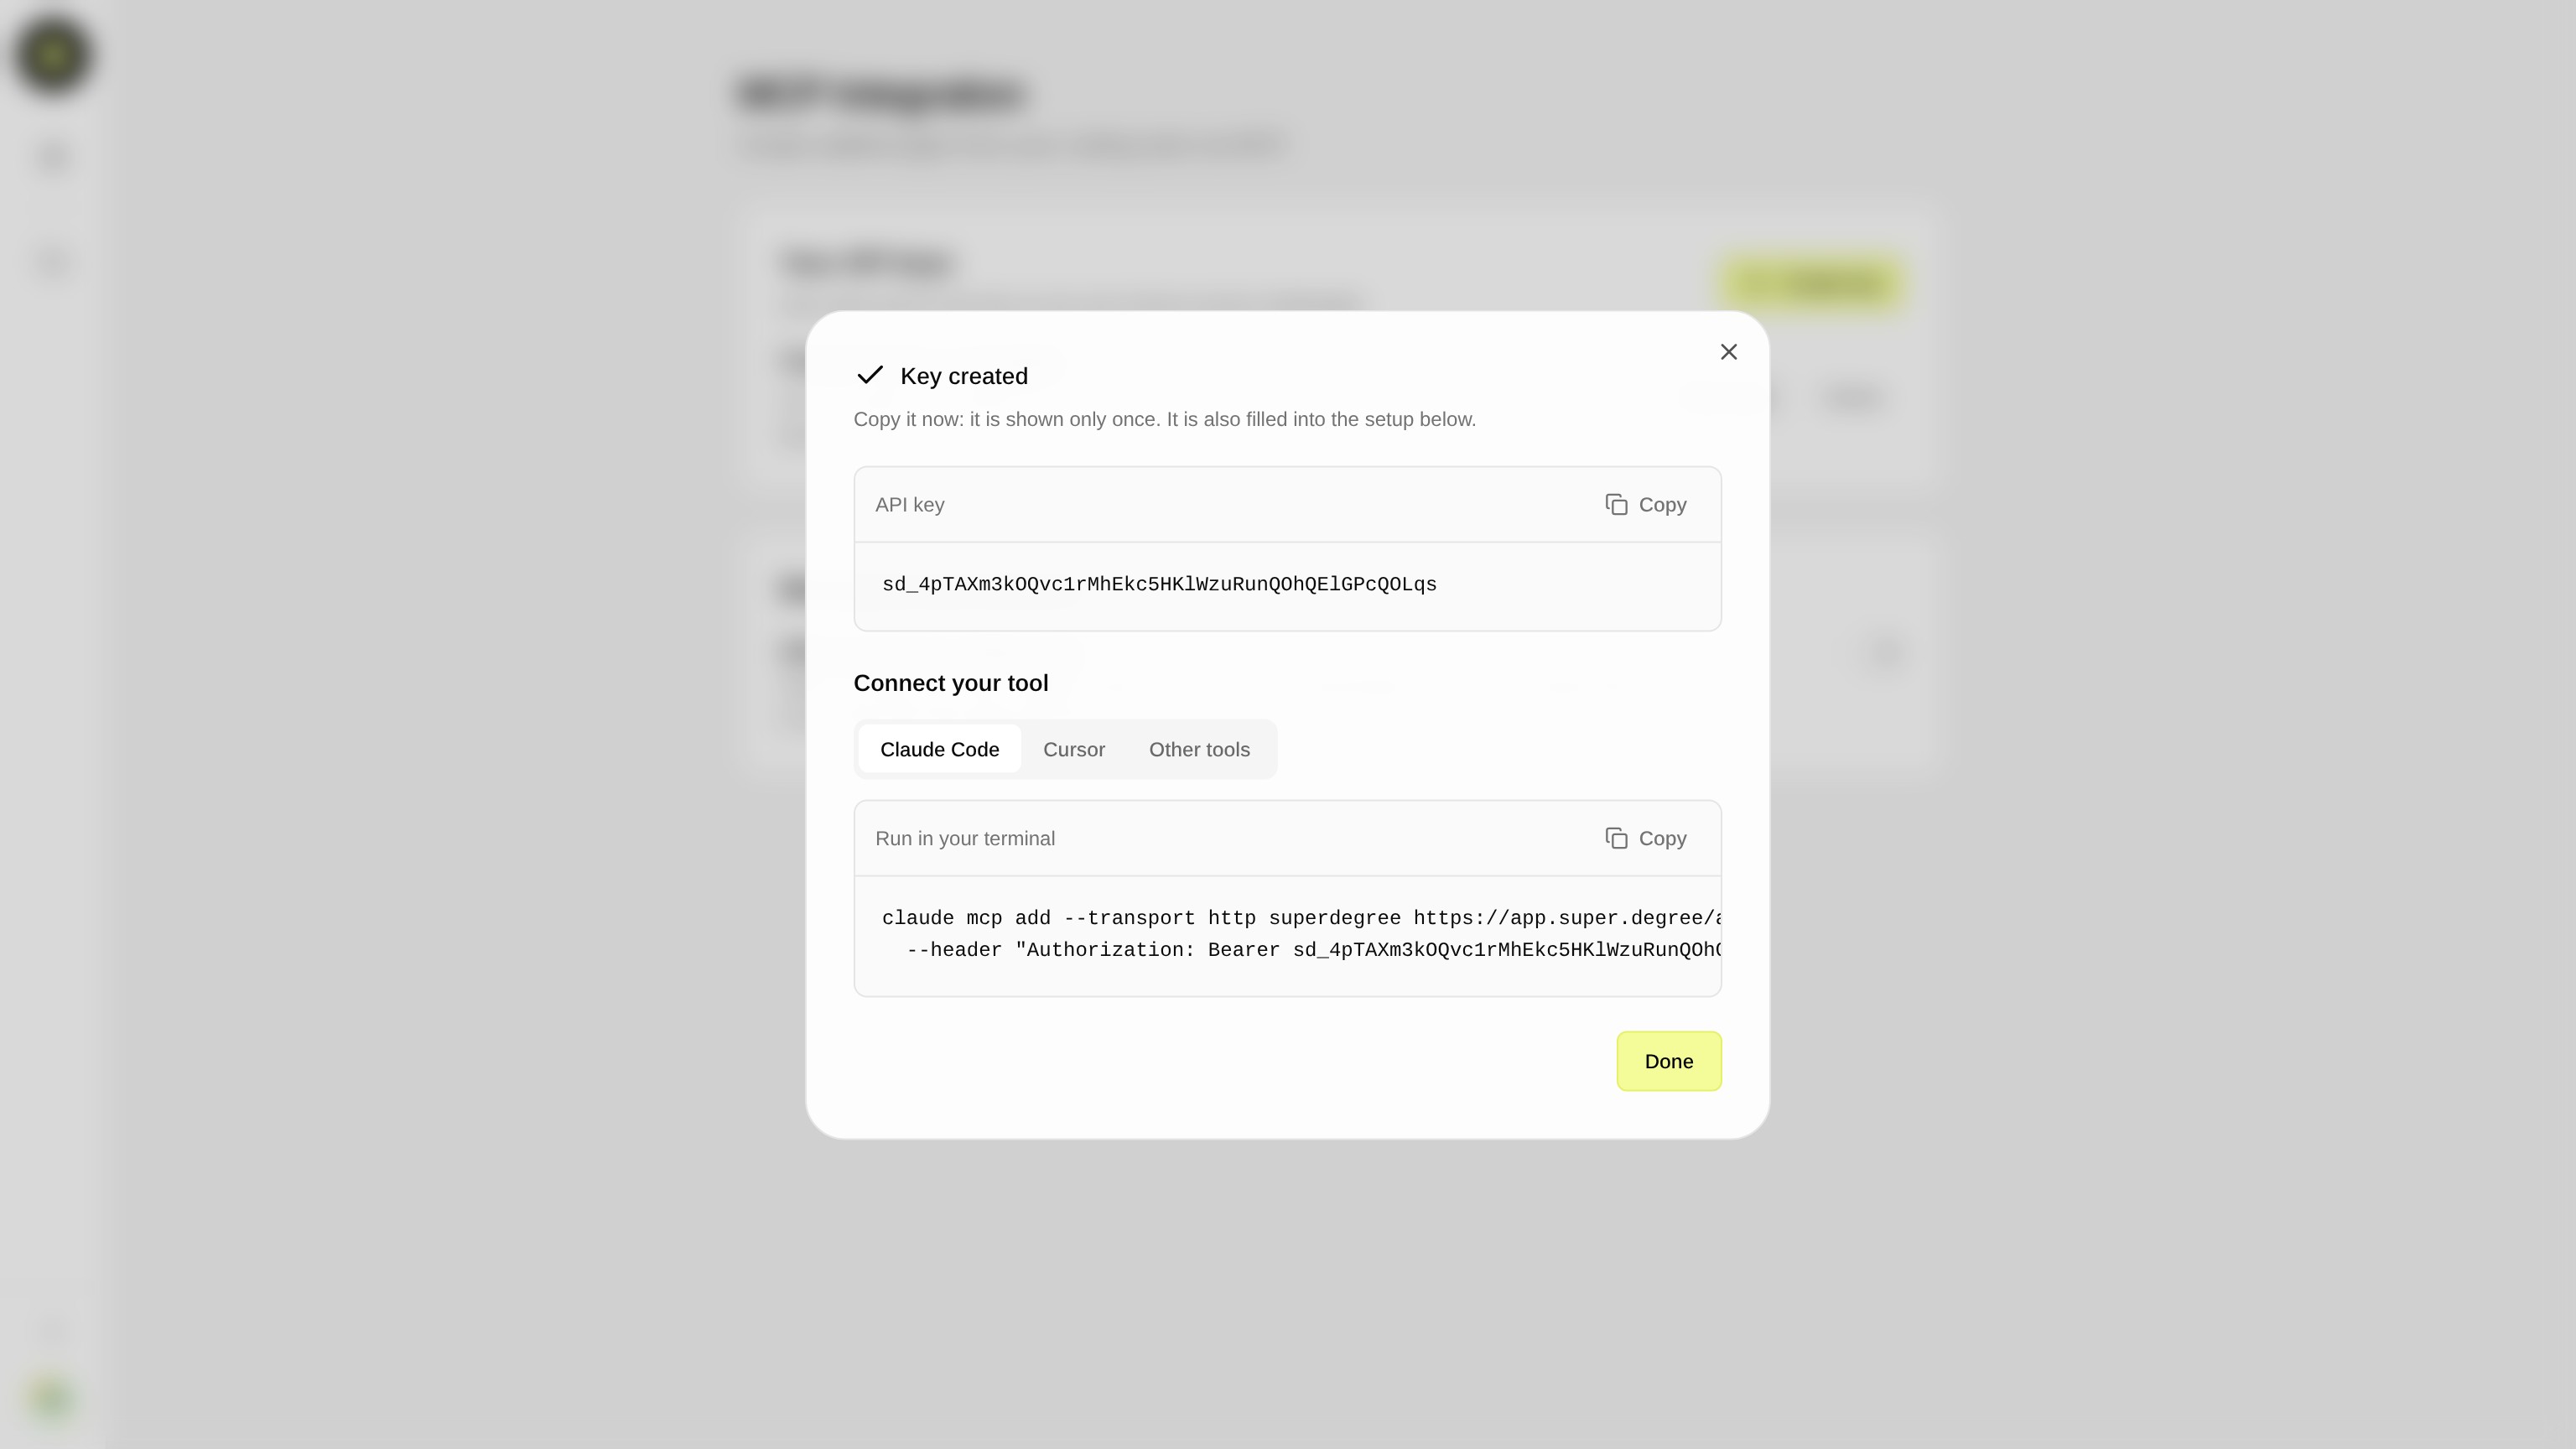
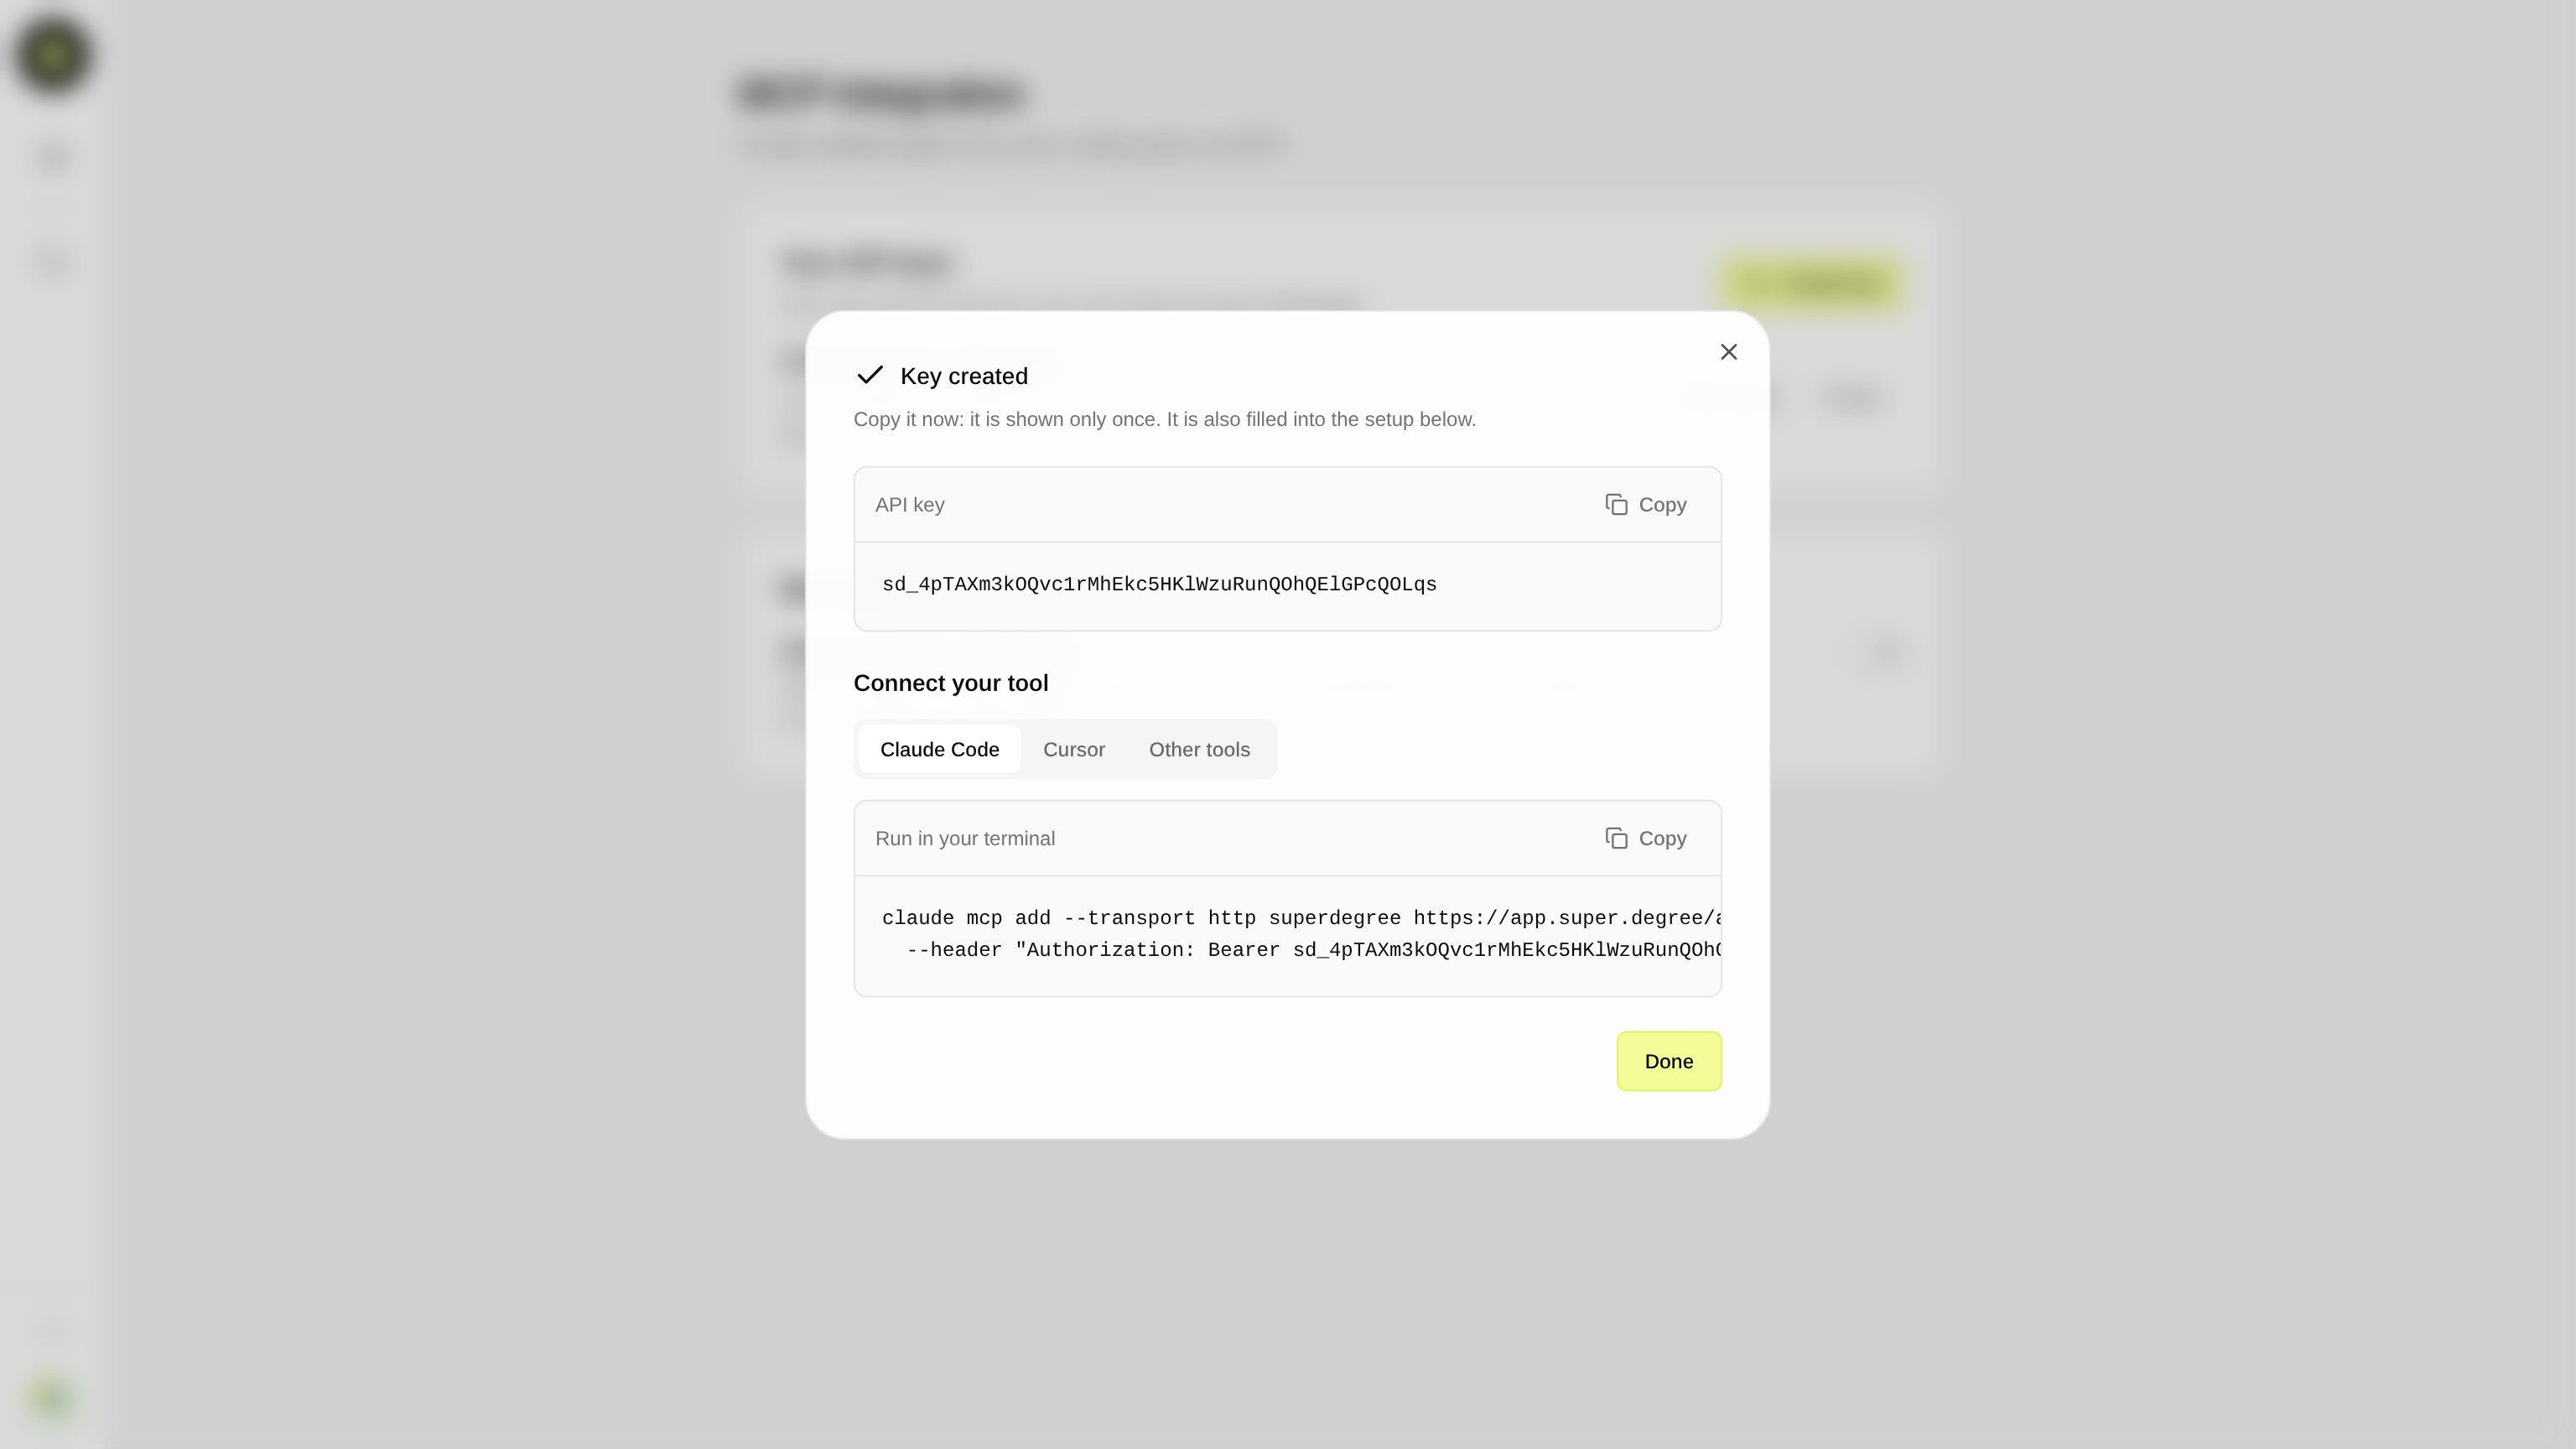
The dialog changes to Key created. Click Copy beside the API key and keep it somewhere safe, such as a password manager. The key is shown only once. Superdegree stores only a fingerprint of it, so nobody can show it to you again after you close this dialog. If you lose it, delete the key and create a new one. While the dialog is open, your key is already filled into the setup commands below it.
Step 5 — Copy the terminal command for Claude Code
Under Connect your tool, keep the Claude Code tab selected. The command under Run in your terminal already includes your new key. Click Copy beside it, paste it into your terminal and press Enter. The command looks like this, with your key in place of YOUR_API_KEY:
claude mcp add --transport http superdegree https://app.super.degree/api/mcp --header "Authorization: Bearer YOUR_API_KEY"
This adds a server named superdegree to Claude Code. By default, Claude Code adds it only to the project folder you run the command in. To use Superdegree in every project, add --scope user to the command.
Step 6 — Review other tools and finish setup
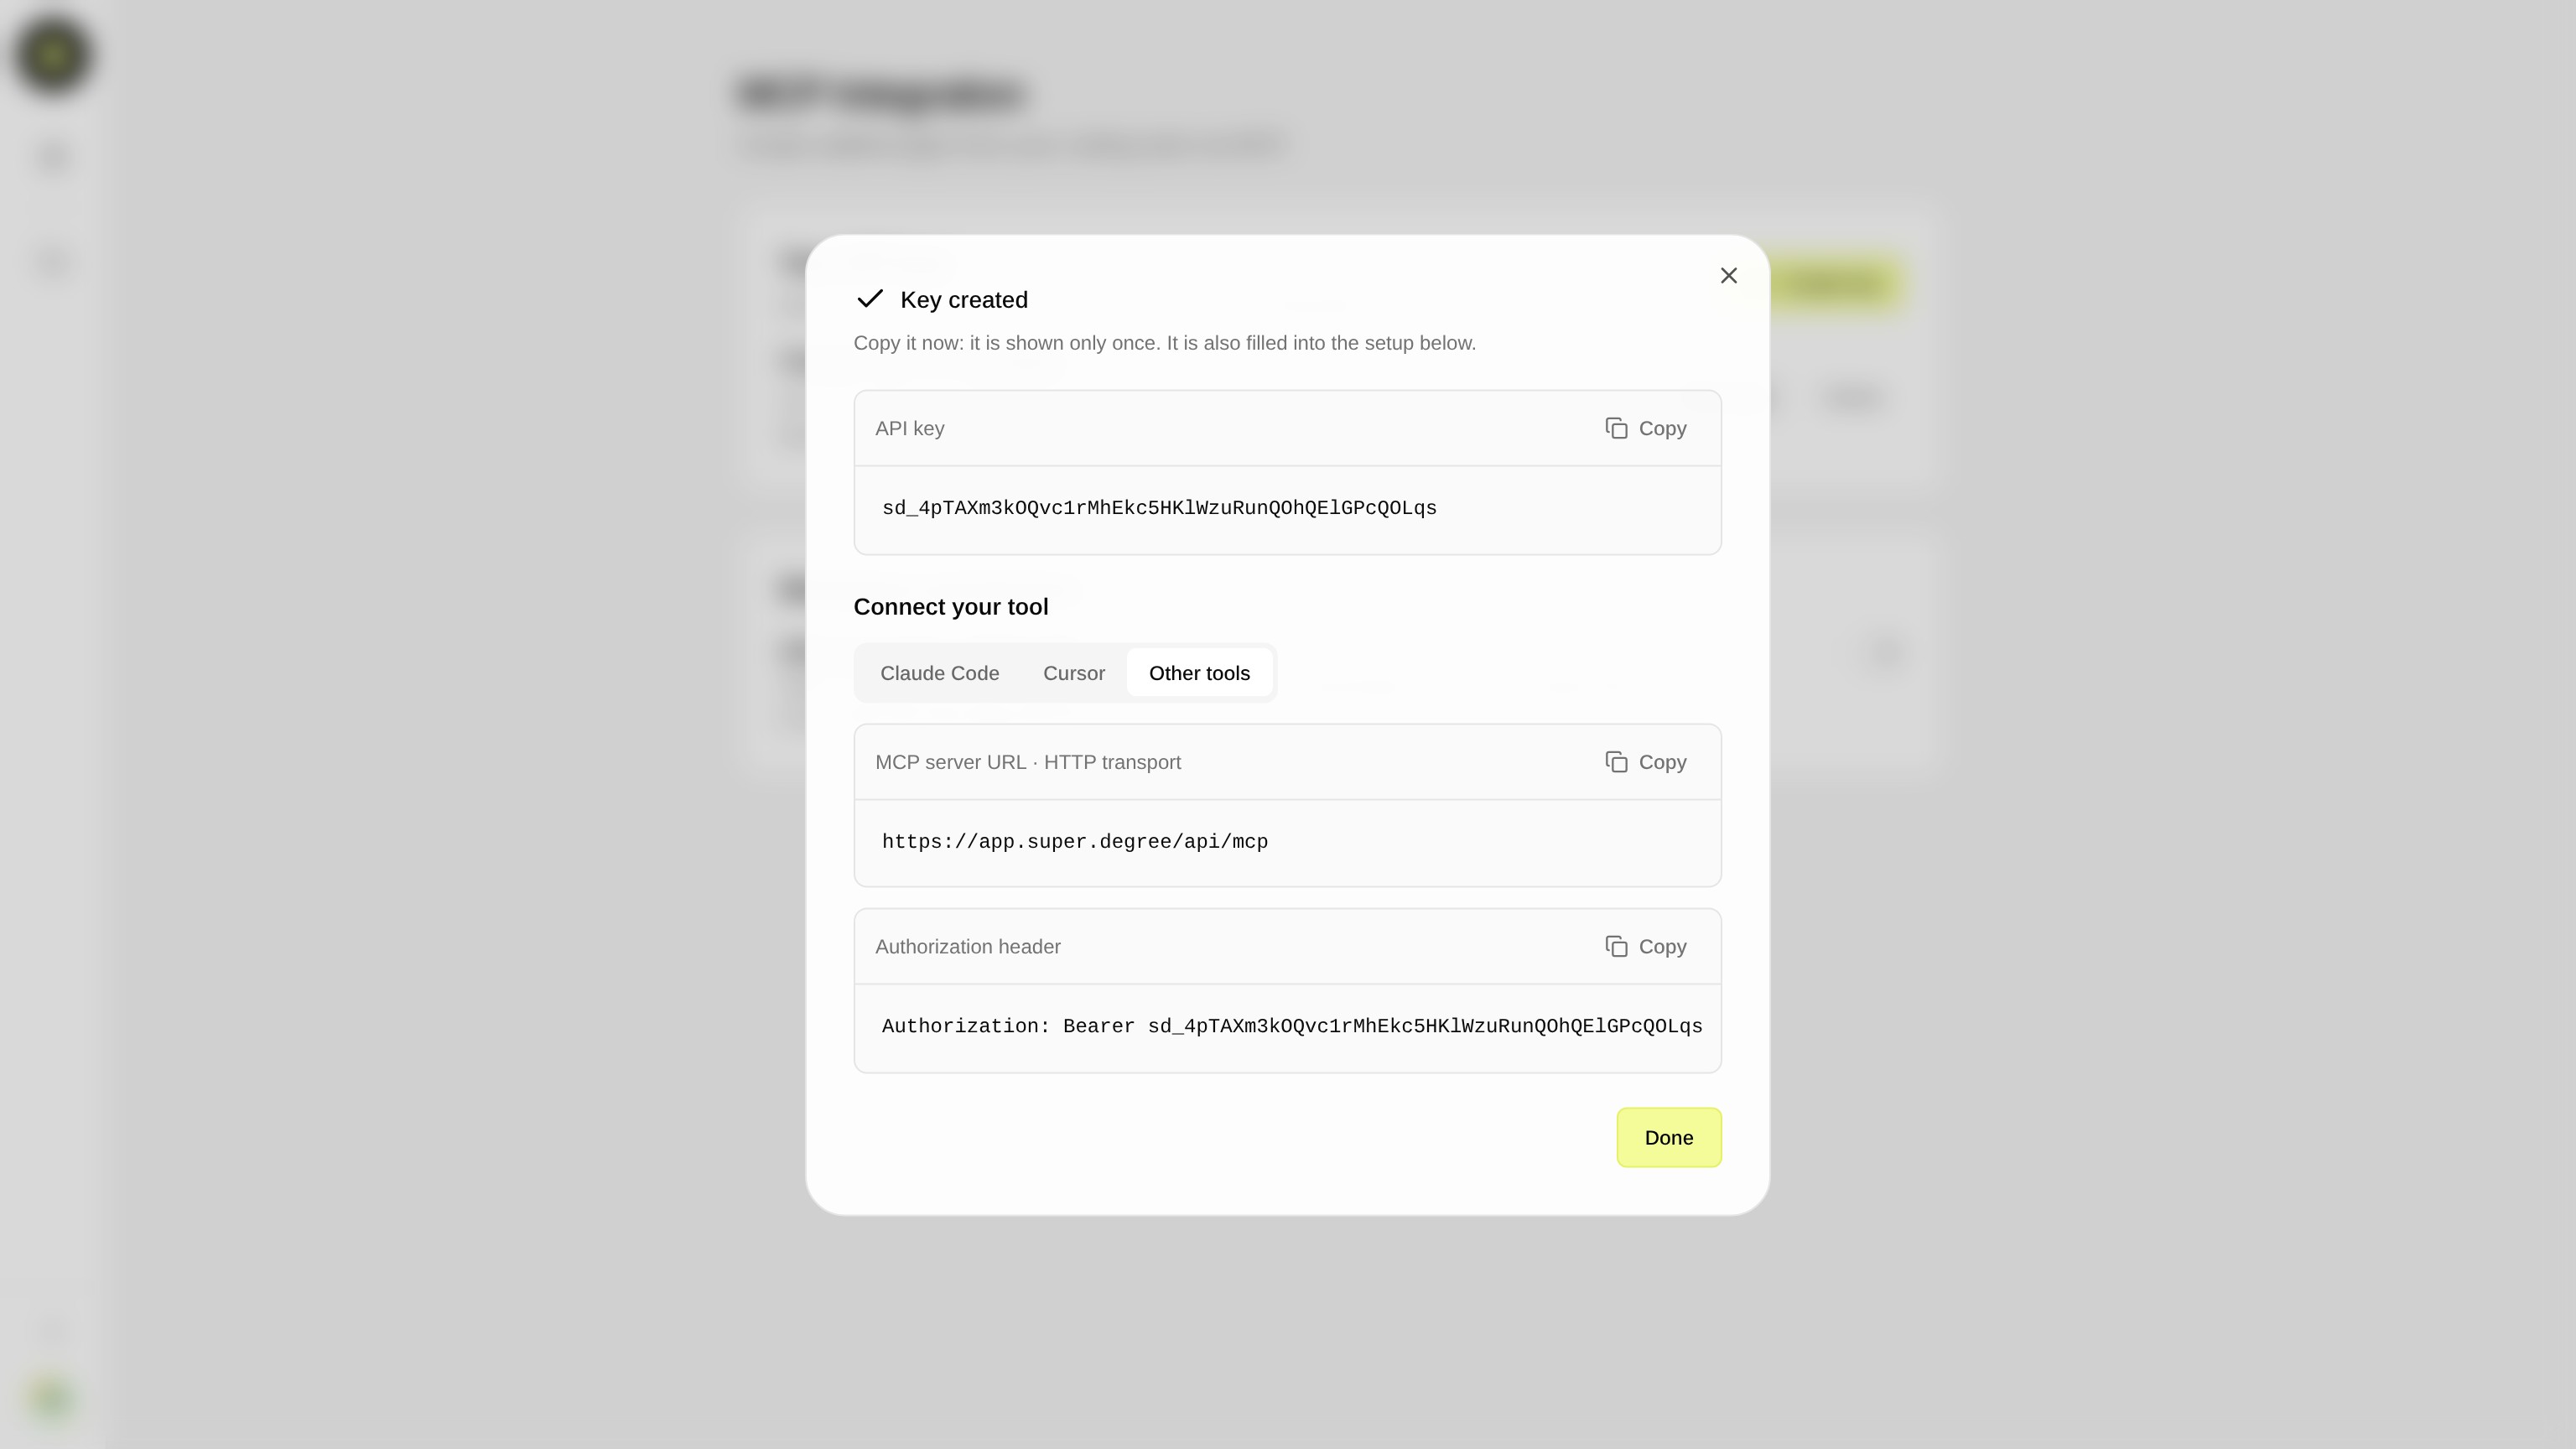
The other tabs give setup details for other tools. Cursor shows a block to add to your project's .cursor/mcp.json file, under mcpServers, with the server URL and your key in an Authorization header. Other tools shows the two values any MCP client needs: the server URL (https://app.super.degree/api/mcp, using HTTP transport) and the header Authorization: Bearer YOUR_API_KEY. When you have copied what you need, click Done. This closes the dialog, and the key is no longer shown.
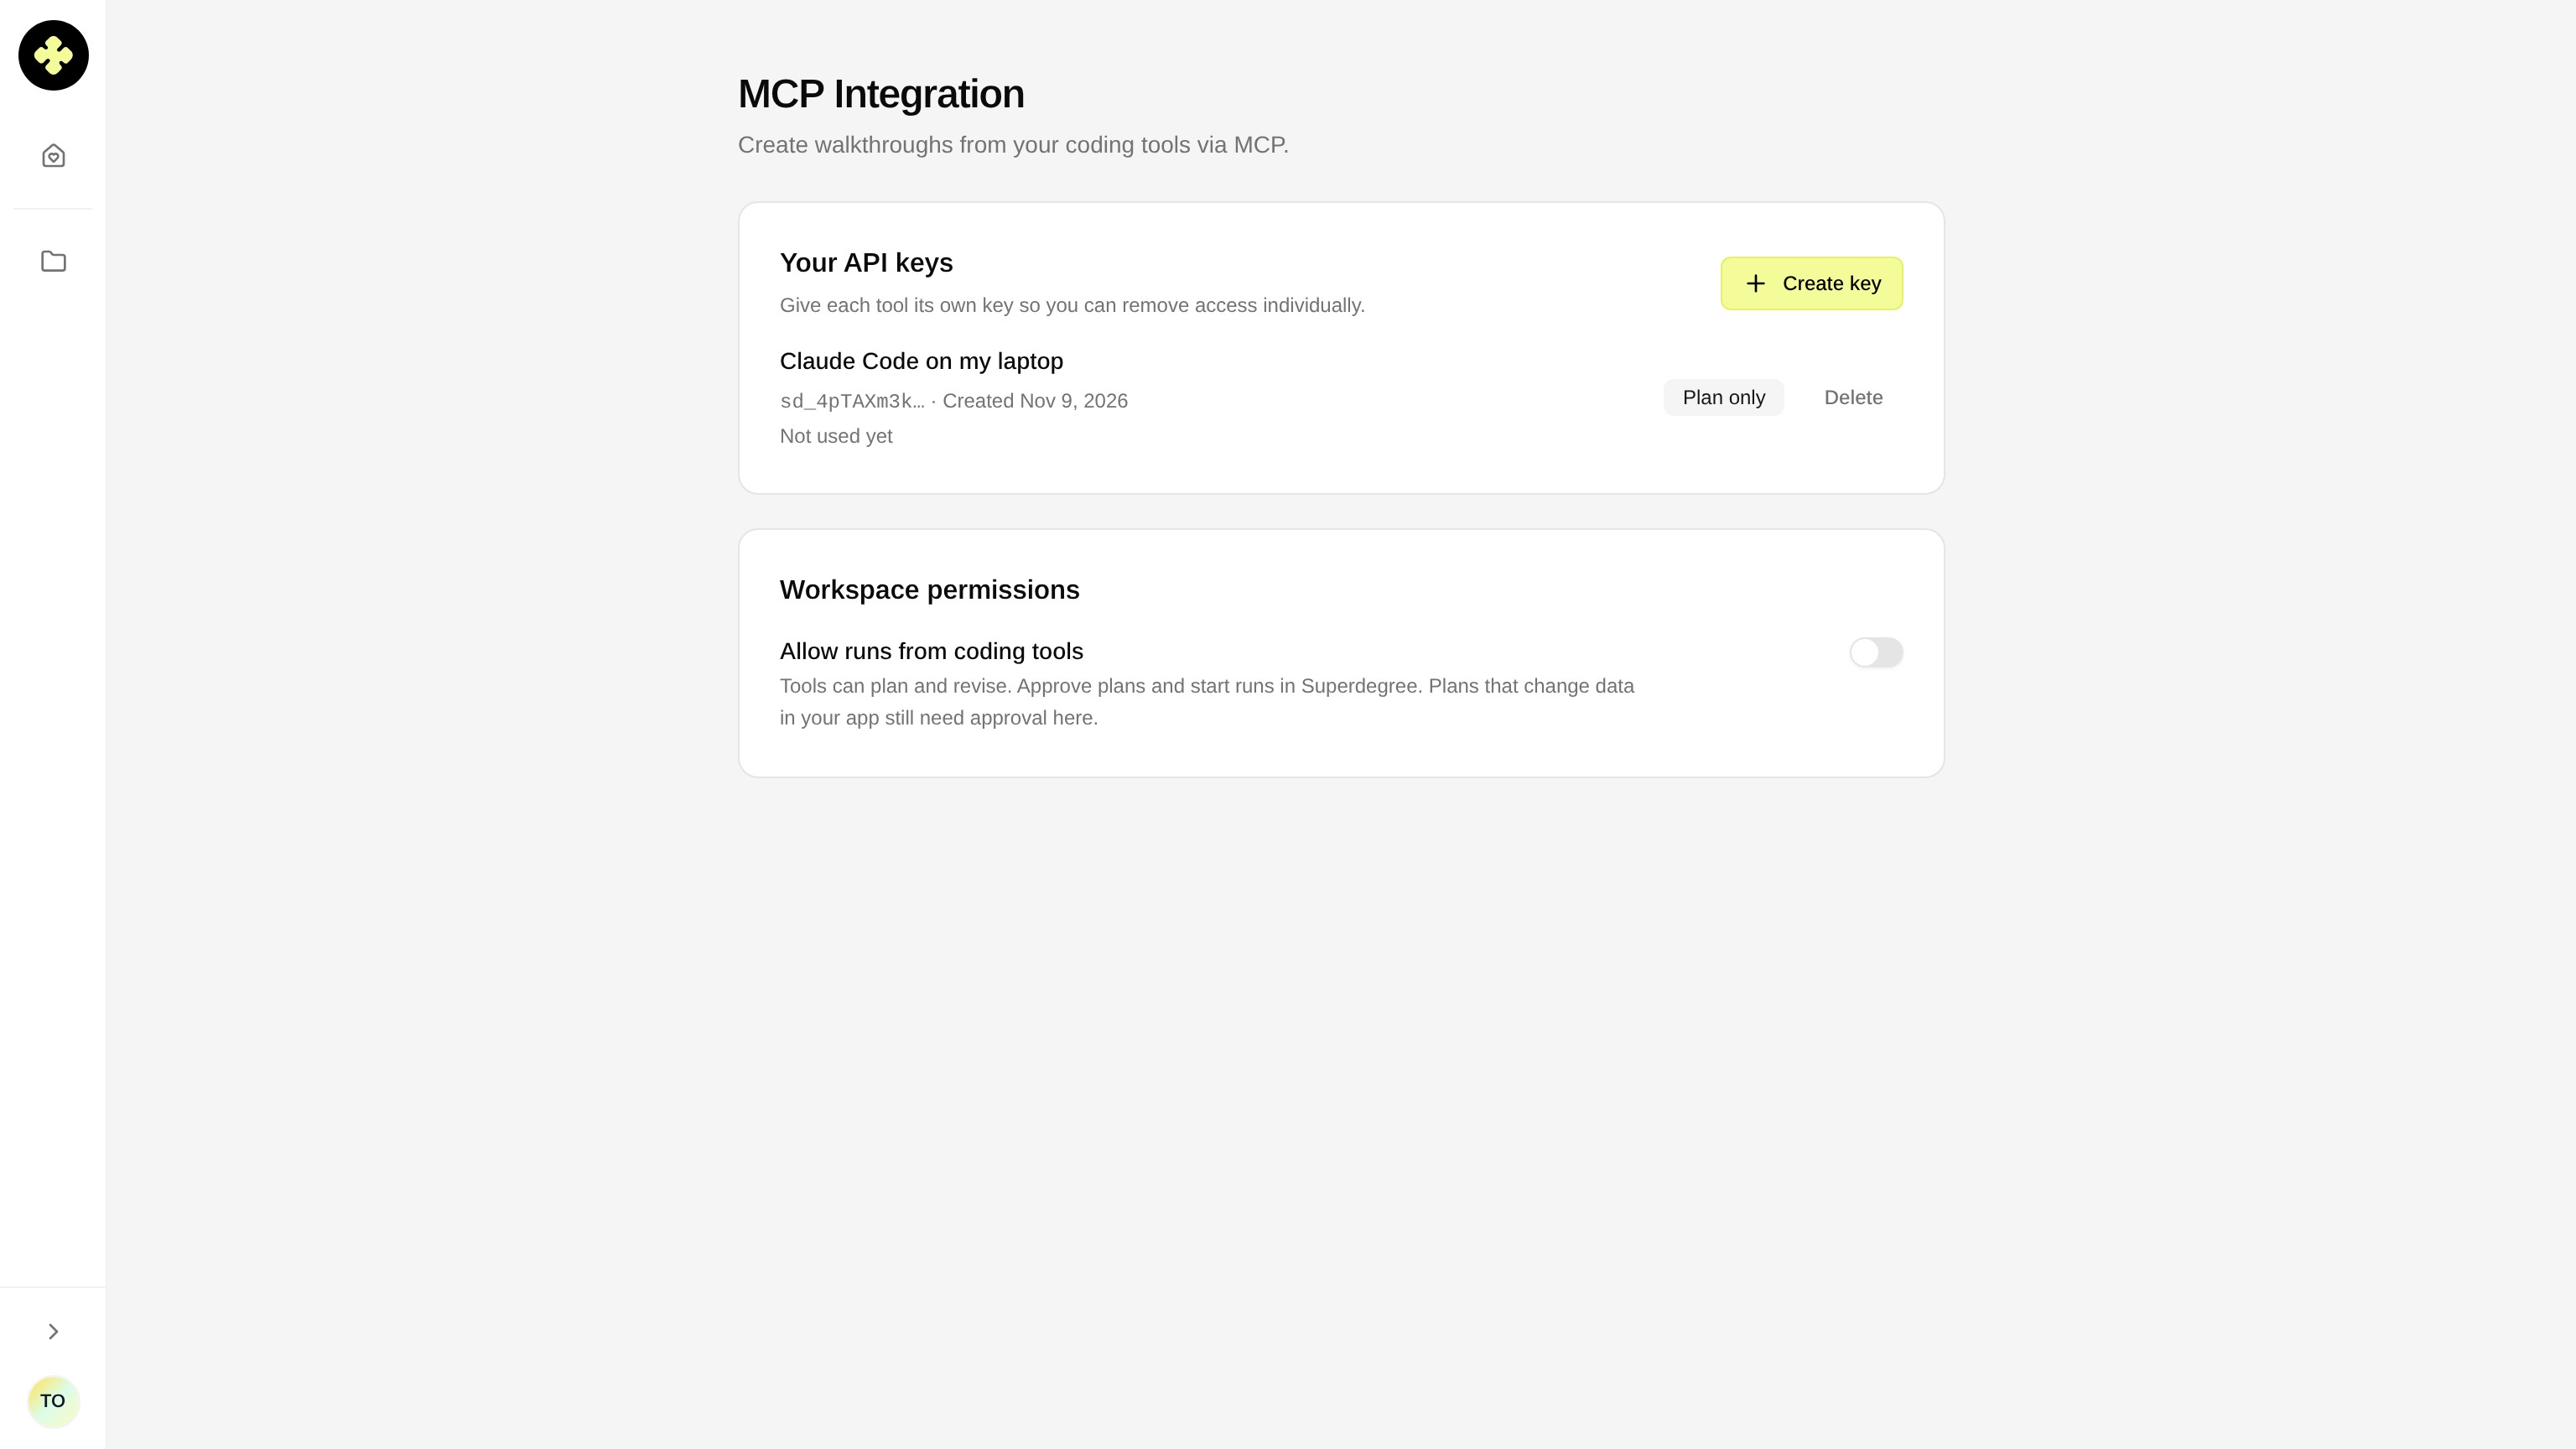
You are back on the Your API keys list, where your new key appears by name. Each key shows the start of its value, the date it was created, and when it was last used. The badge shows what the key can do: Plan only means tools can plan and revise walkthroughs, but you approve plans and start runs in Superdegree. Can start runs means tools can also approve plans and start runs themselves. The workspace setting below controls this badge for every key.
Allow coding tools to start runs
By default, coding tools can only plan. When a plan is ready, you get a link to review and approve it in Superdegree. To let tools approve plans and start runs themselves, turn on Allow runs from coding tools under Workspace permissions on the MCP Integration page, then confirm with Allow runs.
- The setting covers the whole workspace. It applies to every key, including keys created before it was turned on.
- Runs started from a coding tool use your workspace's credits.
- Plans that change data in your app still need approval in Superdegree, even with this setting on.
- Only workspace owners and admins can change this setting.
Check the connection
In your terminal, run claude mcp list. superdegree should be listed as connected. Inside Claude Code, the /mcp command shows the same. Then try a request, such as: "Ask Superdegree for a two-minute video showing how to invite a teammate." Claude Code sends the request to Ask, which replies with a plan or follow-up questions.
If the connection fails, check that you copied the whole key with no extra spaces or line breaks, and that the key has not been deleted. A key's Last used date updates each time a tool connects with it.
Manage and delete keys
To cut off a tool, click Delete beside its key and confirm with Delete key. Tools using that key lose access at once, and deleting cannot be undone. To reconnect a tool, create a new key and run the setup again. A key belongs to your account in this workspace, so give each tool and machine its own key. Then you can remove one without affecting the others.